![[FIXED] How to Fix “Failed to Initialize DirectX” Error on Windows PCs](https://www.auslogics.com/en/articles/wp-content/uploads/2024/11/admin-ajax.php-6-568x343.webp)
- What Is DirectX?
- What Is the “Failed to Initialize DirectX” Error on Windows?
- Common Causes of the “DirectX Failed to Initialize” Error
- General Fixes for the DirectX Error for Most Games and PCs
- Fix 1: Update DirectX
- Fix 2: Update your graphics card driver
- Fix 3: Install or update your Microsoft Visual C++ Redistributable package
- Fix 4: Repair missing or corrupted system files
- Fix 5: Check for malware
- Fix 6: Check for antivirus interference
- Fix 7: Turn off hardware acceleration
- Fix 8: Run the Hardware and Devices troubleshooter
- Fix 9: Test a 32-bit version of the program
- Fix 10: Reinstall the game or application
- How to Fix the DirectX Error for Specific Games on Windows PCs
- The “Failed to Initialize DirectX” Error: Fixed
- FAQ
I’ve been there—you launch a game, maybe Hogwarts Legacy or Sid Meier’s Pirates!, only to get the message: “Failed to initialize DirectX.” It’s also one of those errors that pop up out of nowhere, especially after a fresh Windows install, a graphics card upgrade, or even just after updating a game.
For example, there was a user on the Ask a Question forum who constantly received prompts to install DirectX even though it was already installed. Lots of forums are filled with users struggling with various DirectX errors. Some say reinstalling DirectX helped. Others blame graphics drivers or missing system files.
The truth is, there isn’t just one fix, but there’s definitely a solution for you in this guide. We’ve gathered the most effective fixes based on real user experiences, whether the problem hits your entire system or just a single game.
Let’s begin.
What Is DirectX?
DirectX is a collection of application programming interfaces (APIs) that simplify tasks for graphics-intensive applications and games. It eliminates a lot of work on the part of the game developer, and also, it spares you from installing extra software to be able to run graphics-related processes.
Here’s how it works in real life. Let’s say you’re playing a game and press a button to jump. Your keyboard sends a signal to your PC’s processor, and then the processor tells the game to make that jump happen.
But the hardware (like your graphics card) and the game don’t speak the same “language.” That’s where DirectX steps in. It acts like a translator, ensuring your hardware understands what the game wants it to do.
So when you press jump, DirectX makes sure the graphics and sound respond instantly. Without it, games would struggle to work smoothly with your computer.
The developer outsources hardware communication to Microsoft via DirectX without worrying about hardware compatibility.
What Is the “Failed to Initialize DirectX” Error on Windows?
The “Failed to initialize DirectX” error means that the software you’re trying to launch cannot access the DirectX libraries and therefore cannot render any graphics.
Without using DirectX or a similar rendering package, most graphics-intensive programs simply can’t run, so this is a fairly serious error.
This error happens when you try to launch a program and manifests itself with the following message: DirectX failed to initialize. Please install the correct drivers for your video card.
For example, Windows might think your GPU doesn’t support DirectX due to a miscommunication or outdated drivers.
In the next section, I’ll explain the possible culprits behind the DirectX error.
Common Causes of the “DirectX Failed to Initialize” Error
Let’s break down the common culprits behind the DirectX issue:

If your graphics card isn’t set up right, the drivers aren’t installed properly, or they’re simply outdated, you’re likely to see this error. It’s especially common if you’ve just upgraded your GPU, built a new PC, or haven’t updated your drivers in a while.
Some games rely heavily on those updates to even start. Update your GPU drivers to the latest version and ensure they’re installed correctly.

Sometimes, the problem isn’t with your hardware but with DirectX itself. If something went wrong during installation, or if some files got corrupted along the way, Windows might not be able to load it when your game needs it.
This happens a lot after system crashes or failed updates. Reinstall DirectX from Microsoft’s official site to fix any file corruption.
Certain games come preloaded with settings that your PC might not be ready for, especially if they’re trying to use a DirectX version your graphics card doesn’t support.
If you’re playing an older game on a newer setup (or vice versa), that mismatch can cause the “F ailed to initialize Direct X” message to pop up. Lower the game’s graphics settings or use compatibility mode.

New computer builds are exciting, but they also tend to throw random errors when everything isn’t perfectly configured yet. You might not have the right drivers or the latest patches from Windows Update installed.
A new GPU, in particular, needs the proper setup to avoid DirectX-related problems. Double-check drivers and update Windows to ensure everything is configured correctly.

Windows relies on a lot of files to keep things running smoothly, especially when it comes to graphics. If some of those are missing or broken because of a bad update, malware, or a registry issue, games and apps that need DirectX can suddenly stop working.
Run tools like SFC or DISM to repair system files.

Visual C++ Redistributable files are essential for many programs, including ones that rely on DirectX, to work properly. If they’re missing, outdated, or not compatible with your system, they can prevent DirectX from functioning as it should. Make sure to check that the correct versions of these files are installed to avoid this issue.
So now that you know what might be causing the DirectX error, let’s go ahead and fix it. Below are the most effective solutions people have used.
General Fixes for the DirectX Error for Most Games and PCs
Work your way through these potential fixes and make sure you apply each method correctly. These solutions should work if you’re having problems launching your game or having DirectX issues on your PC:
Fix 1: Update DirectX
If your DirectX is outdated or missing important files, you’ll likely run into the “Failed to initialize DirectX” error.
However, some games or apps might ask for specific versions of DirectX to work properly. This section covers the steps to help make sure DirectX is updated correctly.
Let’s walk through how to check and update DirectX properly.
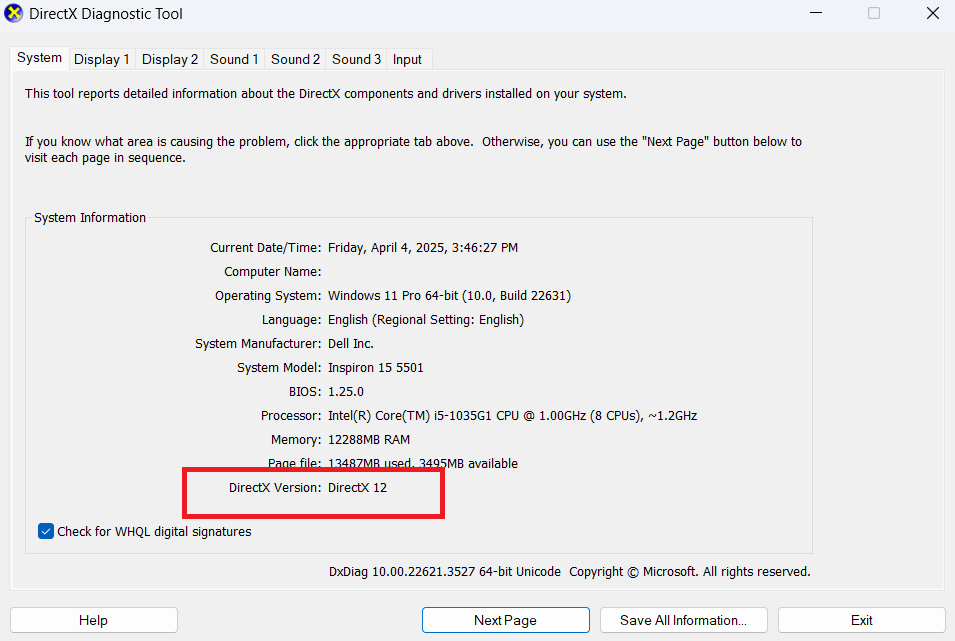
Step 1: Check your current DirectX version
Before doing anything, see which version is installed on your PC:
- Press
Windows + Rto open the Run dialog. - Type dxdiag and hit
Enter.

- When the DirectX Diagnostic Tool pops up, look for DirectX Version at the bottom under the System tab.
Step 2: Update DirectX using Windows Update
The easiest and safest way to update DirectX is by updating Windows itself. Follow the below steps:
- Open Settings and go to Windows Update ( Update & Security > Windows Update in Windows 10).
- Click Check for updates.
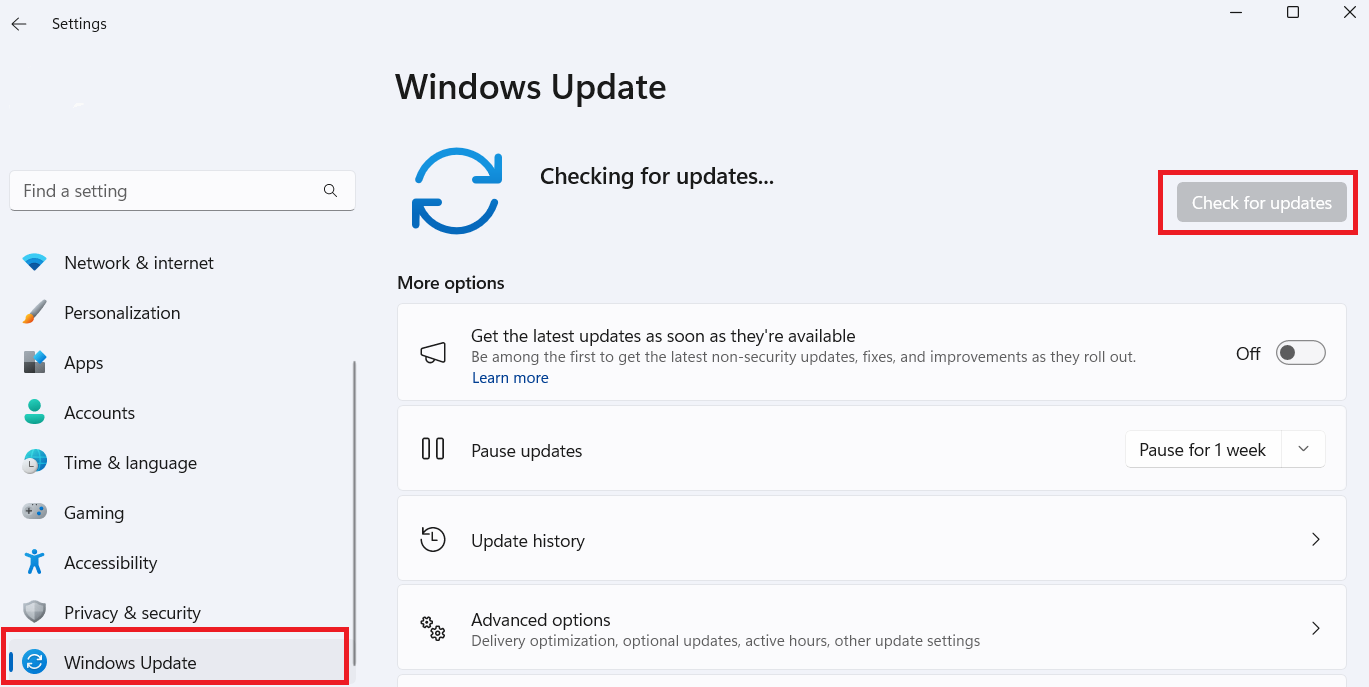
- Install any available updates and restart your PC.
Update Windows if you’ve recently upgraded to Windows 10 or 11 but still have older DirectX versions like DirectX 11 or lower. Updating Windows ensures your DirectX version is current and compatible with new games and programs.
DirectX updates are bundled with major Windows updates. You won’t usually find it as a separate download. So, after the update, check the DirectX version again. If it remained the same, the next fix should help.
Step 3: Download DirectX manually
If you want to be extra sure or need specific files:
- Go to the official DirectX End-User Runtime Web Installer download page.
- Download and run the installer.
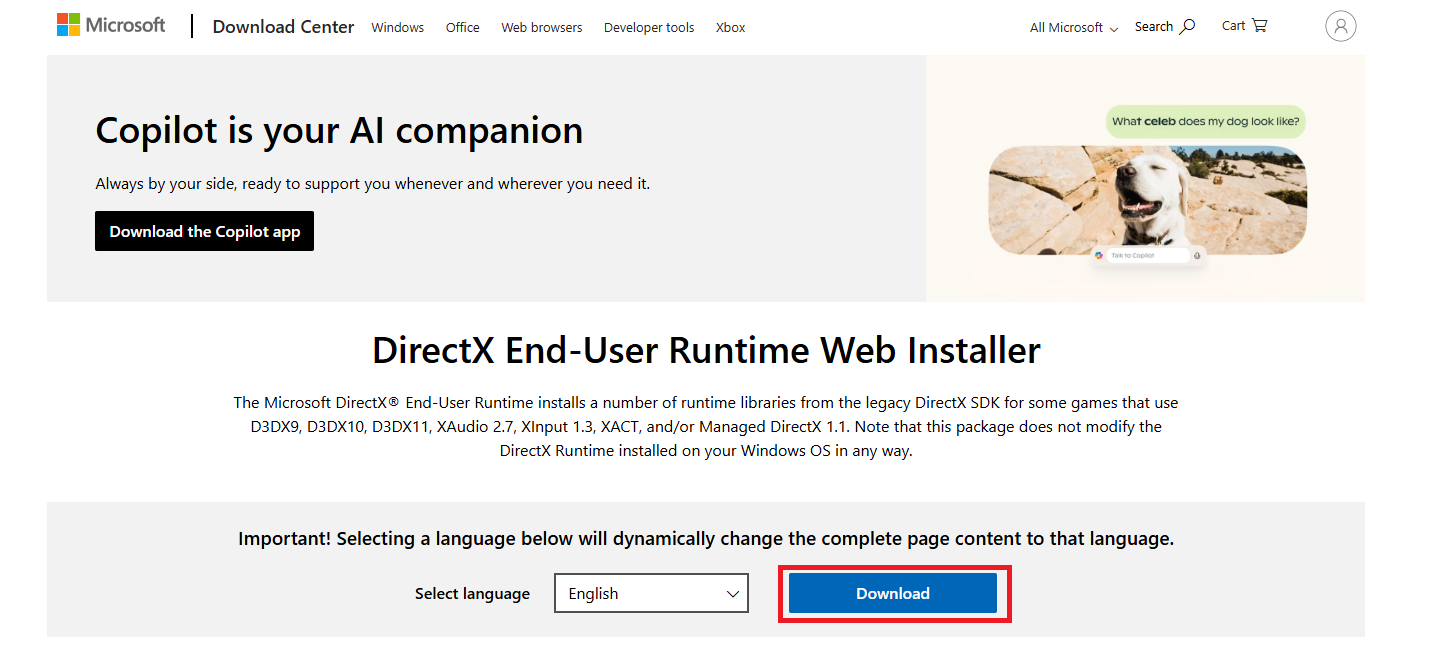
- Follow the prompts to install or repair missing DirectX files.
Also read: How to Download and Install Windows 11: The Most Up-to-Date Information
Fix 2: Update your graphics card driver
If DirectX failed to initialize, there’s a good chance your graphics card driver is outdated, corrupted, or simply not playing well with your system, especially if you’ve recently upgraded to Windows 10 or 11.
Here’s what might be going wrong:
- Your old driver doesn’t support Windows 10 or 11.
- The driver is compatible, but it’s too outdated to support newer features needed by games or programs.
- The driver itself is corrupted or incomplete.
Graphics card manufacturers (like NVIDIA, AMD, and Intel) release regular updates to support new technologies like ray tracing, DLSS, or advanced DirectX features. If your driver is outdated, your system might not keep up. Here’s how to fix the problem:
I’ll show you two easy ways you can choose to update your GPU drivers. Choose the one that works best for you:
➡️ Option 1: Use the manufacturer’s software
It generally makes sense to use your GPU brand’s own tool to update your graphics drivers. That way you get the most accurate and compatible drivers for your system. Here’s how to do it:
- Download and install the tool from your brand, like Intel Driver & Support Assistant, NVIDIA App, or AMD Radeon Software, for your graphics card.
- Run the program and check for updates.
- Download and install any available graphics driver updates.
- Reboot your system afterward.
These tools often notify you when new drivers are available and can even auto-install them for you.
➡️ Option 2: Use Device Manager to search for the latest driver
- Type device manager in the search box and press
Enter.
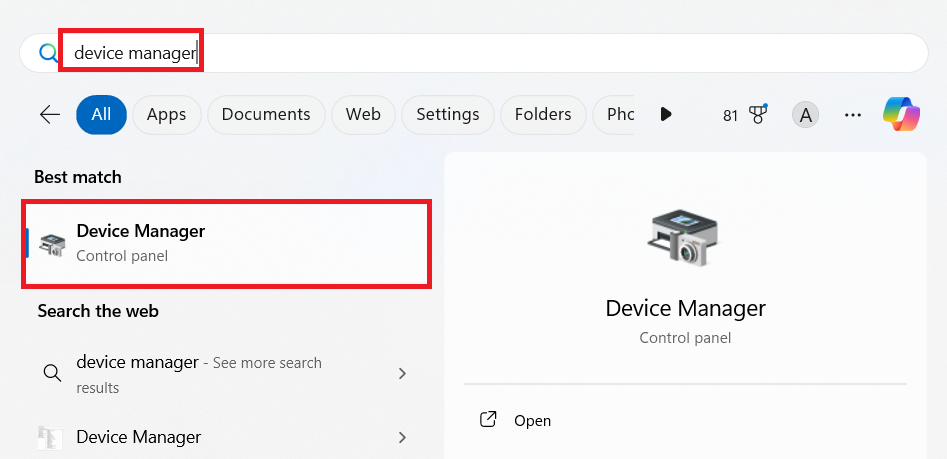
- Expand the Display adapters section, right-click your graphics card, and choose Update driver.
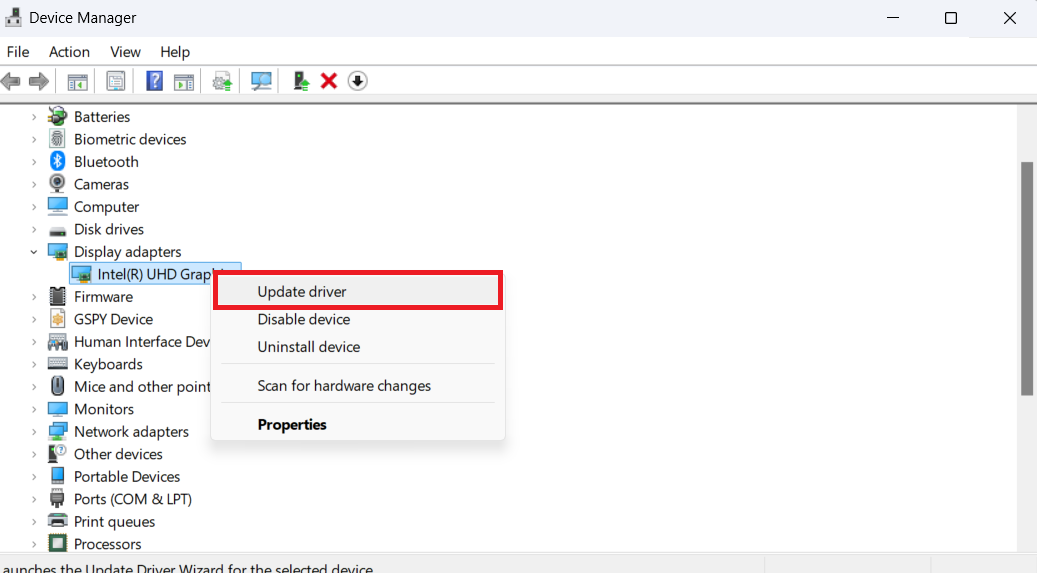
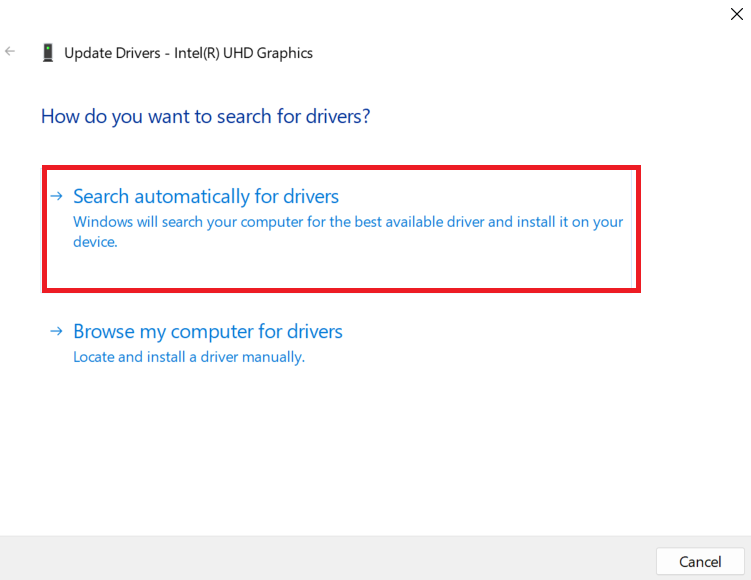
- Select Search automatically for drivers, and let Windows find and install the latest version.
Restart your computer so the changes take effect. Then, check if the D irectX err or is fixed. If you see two display adapters, it usually means you have integrated and dedicated graphics (like Intel and NVIDIA). Update both if you can.
Fix 3: Install or update your Microsoft Visual C++ Redistributable package
Some programs rely on Microsoft Visual C++ Redistributable to render graphics properly. If the required files are missing, outdated, or corrupted, you might run into the “Failed to initialize DirectX” error.
Here’s what to do:
Step 1: Install the latest Visual C++ Runtime
Download and run the Visual C++ Redistributable for Visual Studio 2015–2022. This installs redistributables for Visual Studio 2015, 2017, 2019, and 2022—all in one.
Many newer games and apps depend on these versions. In other words, if you’re using Windows 10 or higher, this should work for you.
Step 2: Install older Visual C++ Redistributable vrsions
Some programs don’t use the latest Visual C++ files, so they may need a specific version from years ago. If you’ve installed the latest package and still get the error, this could be why.
You can get earlier versions of Visual C++ from their separate download pages:
- Visual Studio 2013 (VC++ 12.0)
- Visual Studio 2012 (VC++ 11.0)
- Visual Studio 2010 (VC++ 10.0) SP1
- Visual Studio 2008 (VC++ 9.0) SP1
If you don’t know which version to install, check the program’s system requirements or download page. They usually mention something like “Requires Visual C++ 2010 Redistributable.” You might also see an error message with a specific version mentioned, like “MSVCP100.dll is missing.” This is Visual C++ 2010. Below is a table to help you determine which Visual C++ Redistributable packages to install for your Windows version:
| Windows version | Recommended packages | Notes |
|---|---|---|
| Windows 11 |
|
|
| Windows 10 |
|
Some older apps may still require 2010 or 2013 versions |
| Windows 8.1 |
|
You may need to install all major versions for compatibility |
| Windows 7 |
|
|
Fix 4: Repair missing or corrupted system files
You could be experiencing the DirectX error because your PC is missing crucial system files. You can use the SFC and DISM tools to repair the faults. Here’s how it works:
Running the SFC scan
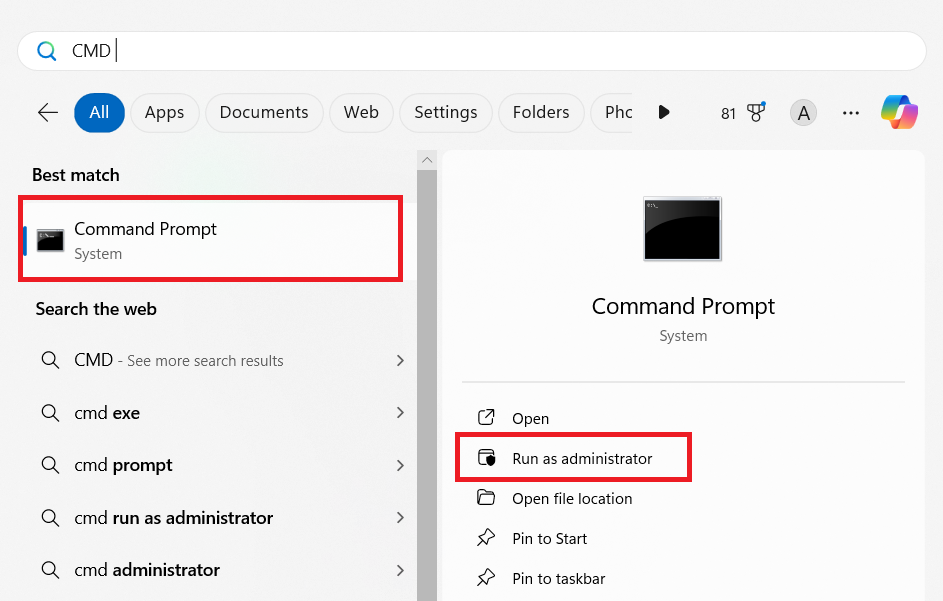
- Open the Command Prompt by typing CMD in the search field, right-clicking on Command Prompt, and selecting Run as administrator.
- Type the sfc /scannow command and press
Enter.

- Wait for the scan to complete. If any issues are found, SFC will attempt to repair them automatically.
Running the DISM scan
-
- Open the Command Prompt as an administrator.
- Type the following commands one at a time, pressing
Enterafter each:
DISM /Online /Cleanup-Image /CheckHealth

DISM /Online /Cleanup-Image /ScanHealth

DISM /Online /Cleanup-Image /RestoreHealth

Wait for each process to complete before moving to the next.
Fix 5: Check for malware
It’s possible that a malware infection is blocking DirectX processes, which is causing the “Fa iled to initialize DirectX ” error. Here’s how to check and resolve the issue with Windows Defender:
For Windows 11
- Press
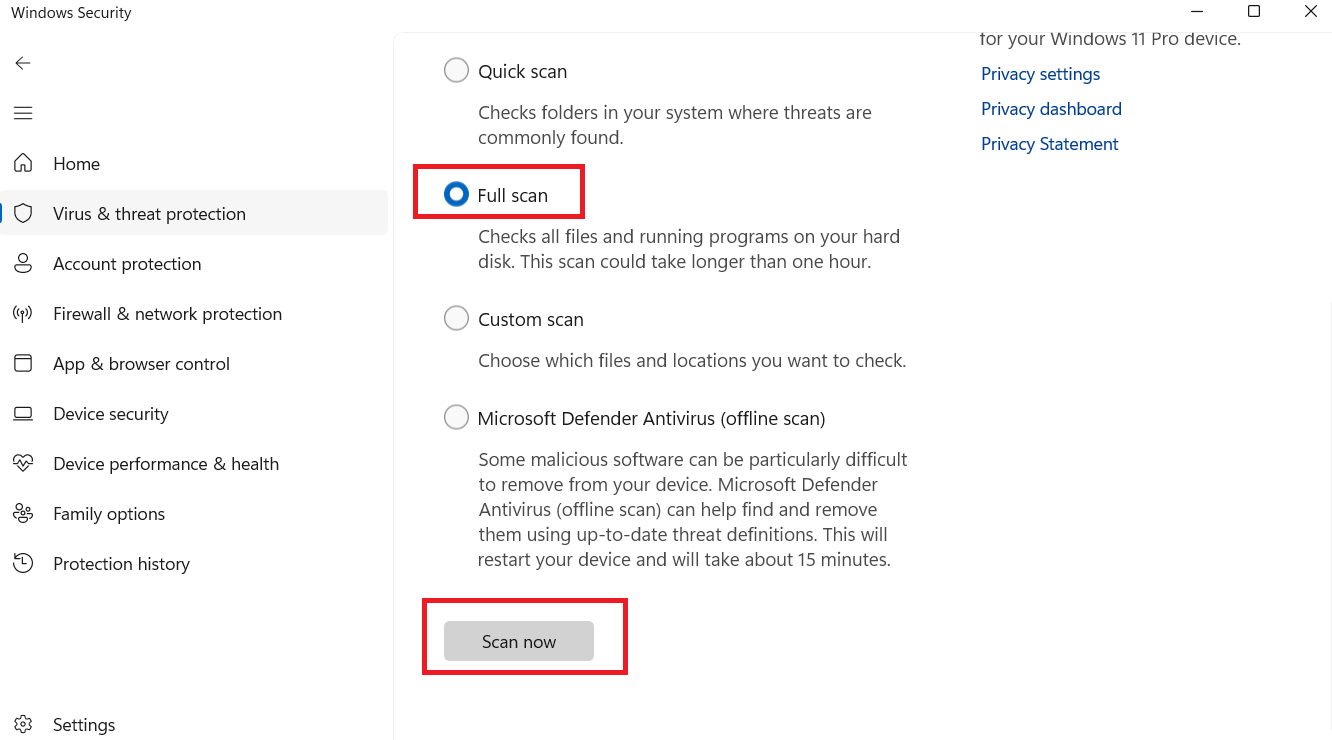
Windows + Son your keyboard and type Virus & threat protection, and click the best match.

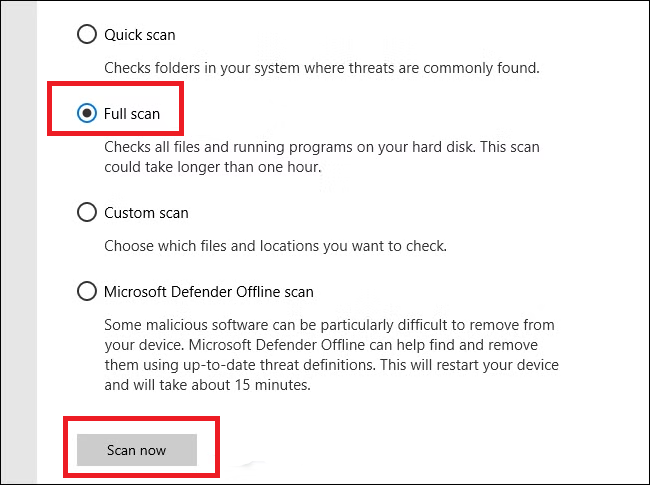
- Go to Scan options, select Full scan, and click Scan now.
Windows 10
- Open the start menu and type Windows Security.
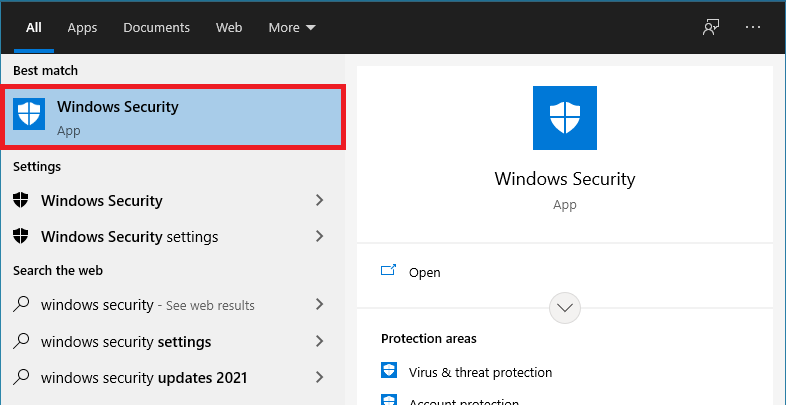
- Click Virus & threat protection in the sidebar and select Scan options.
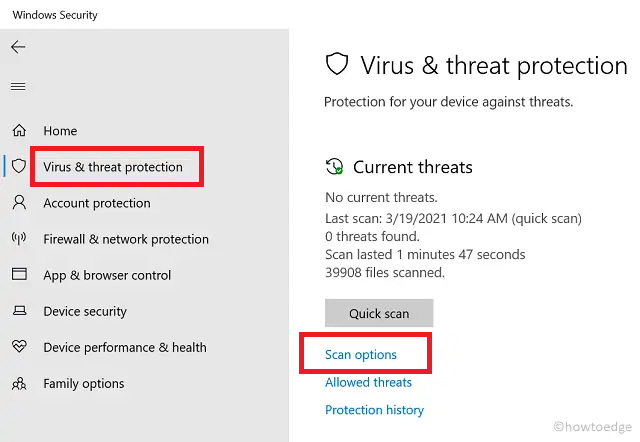
- Select Full scan and click on Scan now.
Allow the scan to complete and follow any prompts to remove detected threats. If you’re not using Windows Defender, go through similar steps for your antivirus and perform a full scan.
Fix 6: Check for antivirus interference
Overly aggressive antivirus settings can prevent DirectX processes from running. Here’s how to check if that’s the case and fix it:
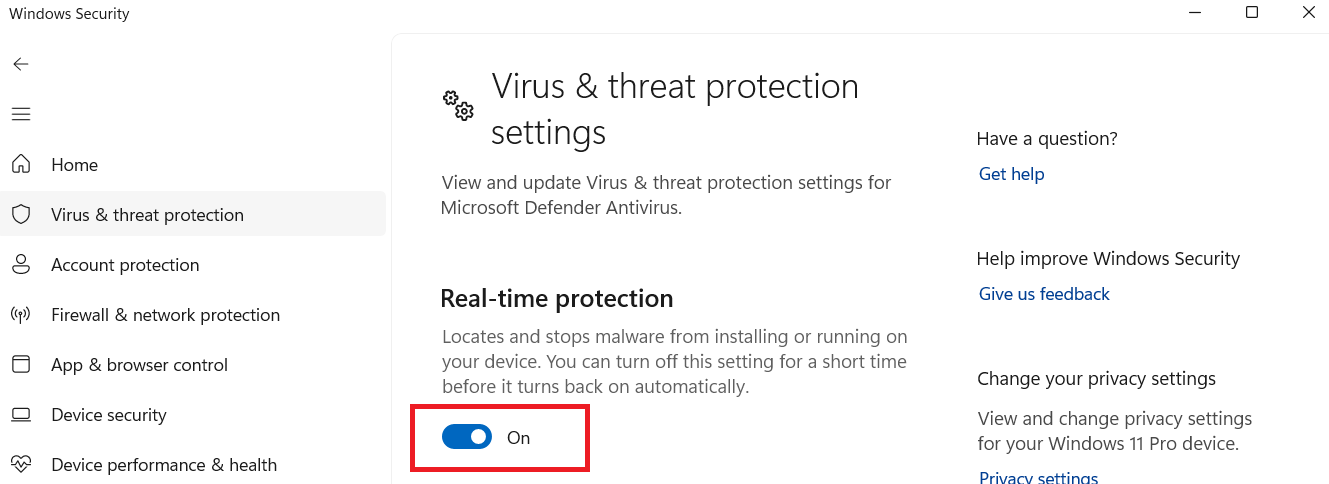
- Go to Virus & threat protection, scroll down, and click Manage settings under the Virus & threat protection settings section.

- Toggle the switch under Real-time protection to Off.
- Test if the error persists. If disabling resolves the issue, add the game or application to the exclusions list.
- To add an exclusion, go to Virus & threat protection settings, select Manage settings, and click Add or remove exclusions.
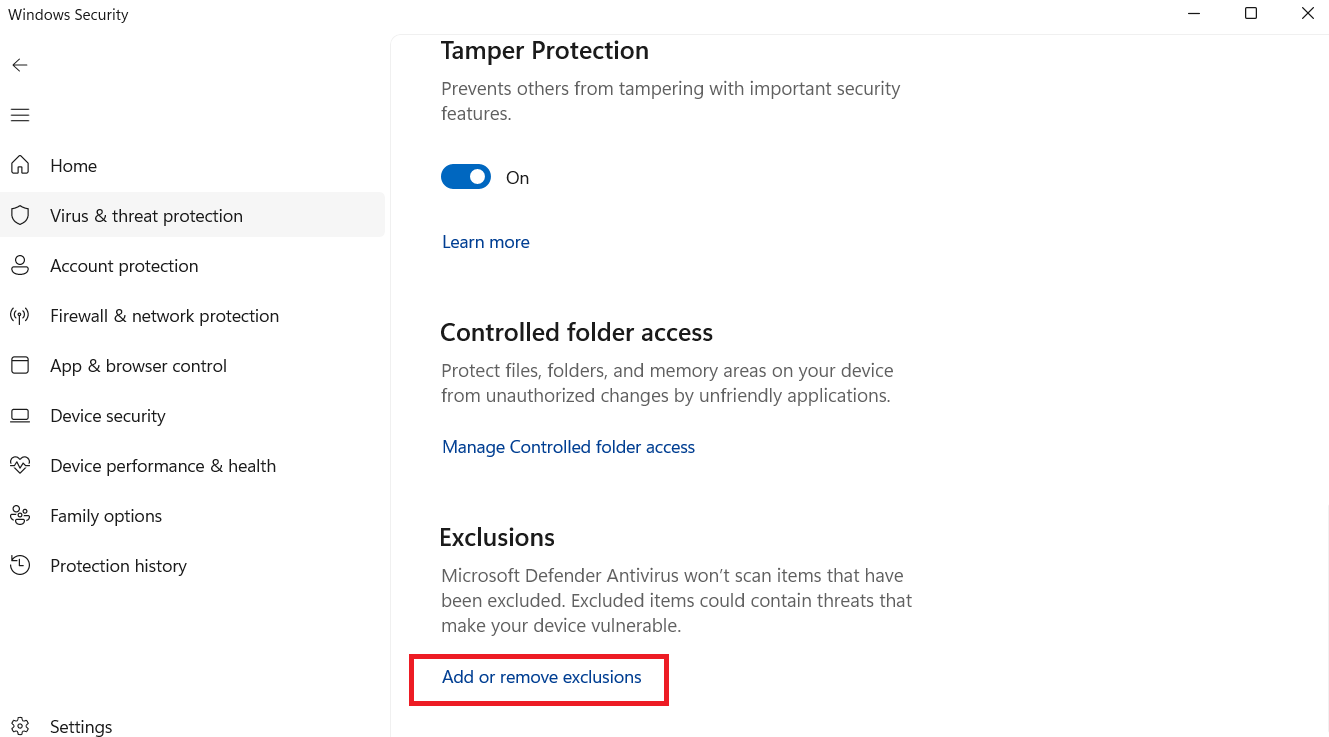
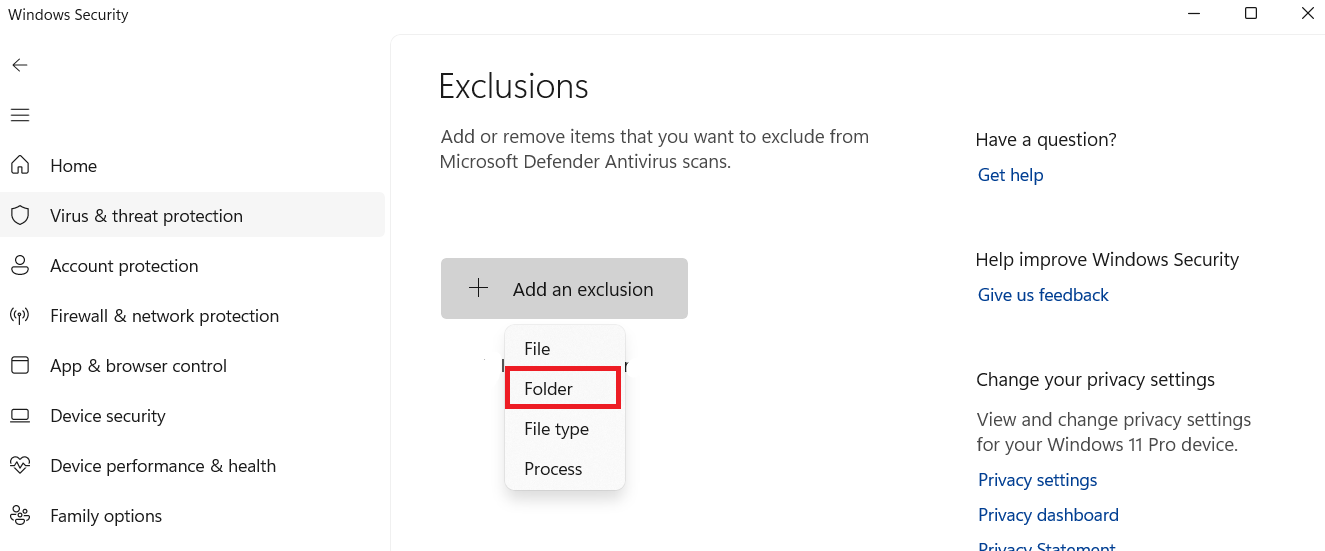
- Finally, click Add an exclusion and select the game folder.
Fix 7: Turn off hardware acceleration
Hardware acceleration is a feature that uses system hardware to take the burden off your software in some situations and for some operations. Hardware acceleration is most common on general-purpose computers that feature a discrete video card or some other specialized hardware.
The principle behind this feature is that the CPU offloads some demanding tasks to the video card for more efficient performance.
When the CPU is overworked, dumping some of the work on the graphics card can save the day, allowing faster and better operation processing and delivery.
Irrespective of the benefits, you may need to disable hardware acceleration, at least temporarily, to solve the “Failed to initialize DirectX ” error.
Here’s how to disable hardware acceleration on Windows 10 and 11:
Not all computers support hardware acceleration. If your system doesn’t have this feature or you can’t find the option to disable it, you can skip this step and move on to the next fix in the guide.
To check if you have it, press Win + R, type dxdiag, and hit Enter. Go to the Display tab and look for options like Direct3D Acceleration or Hardware Acceleration. If it’s set to Enabled, your system supports the feature. If not, move on to the next fix.
For Windows 11
- Press
Win + Ito open the Settings app. - Click on System and select Display.
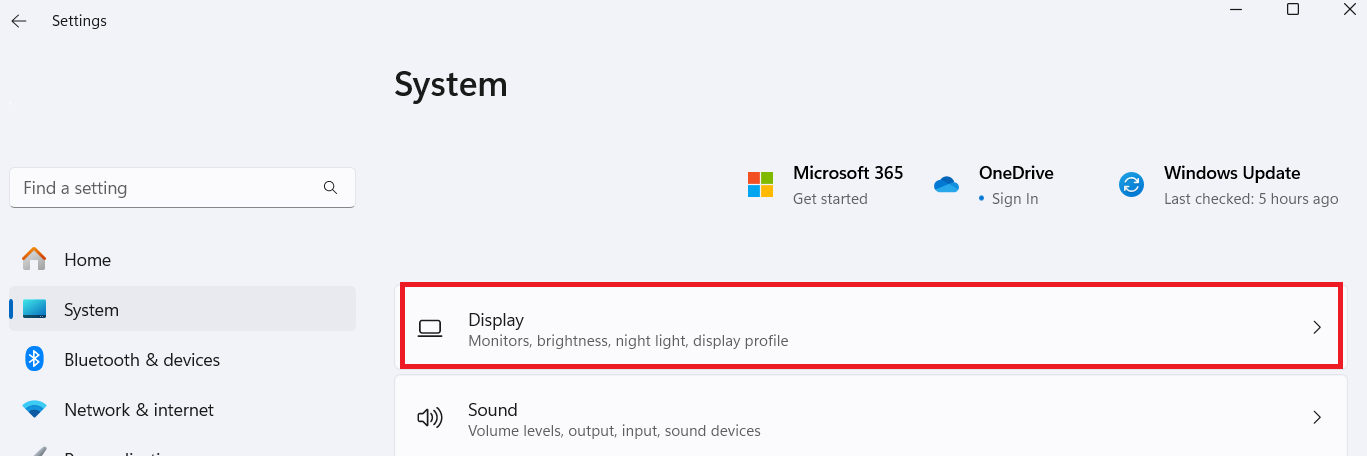
- Select Graphics under Related settings.
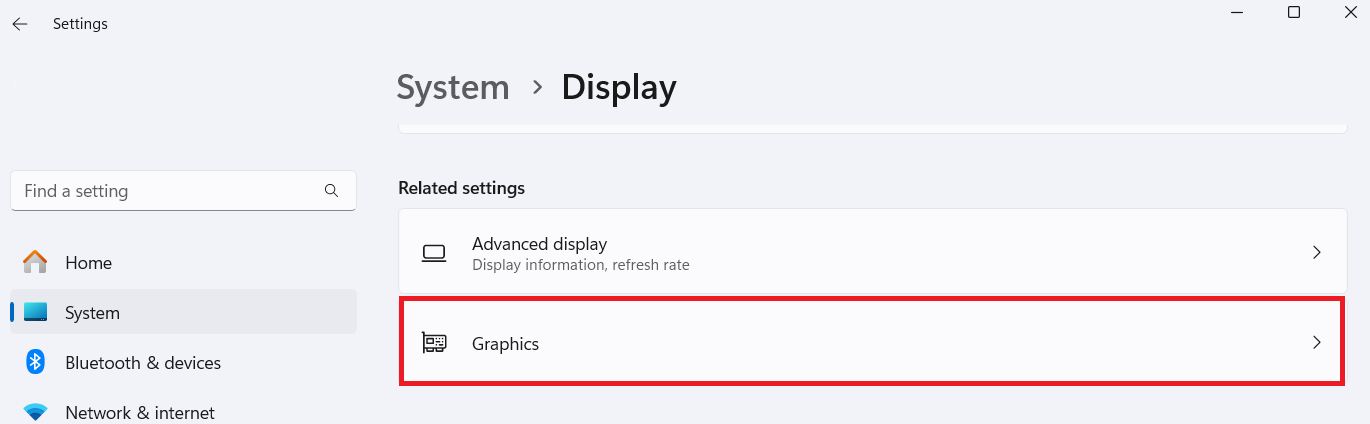
- Then, click Change default graphics settings.
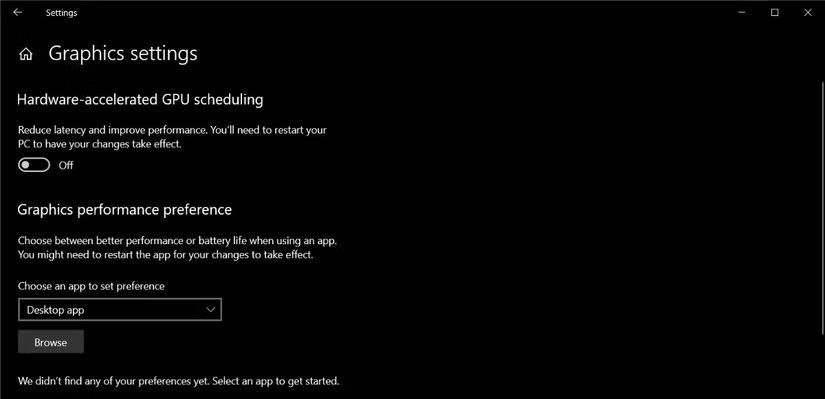
- Toggle off Hardware-accelerated GPU scheduling.
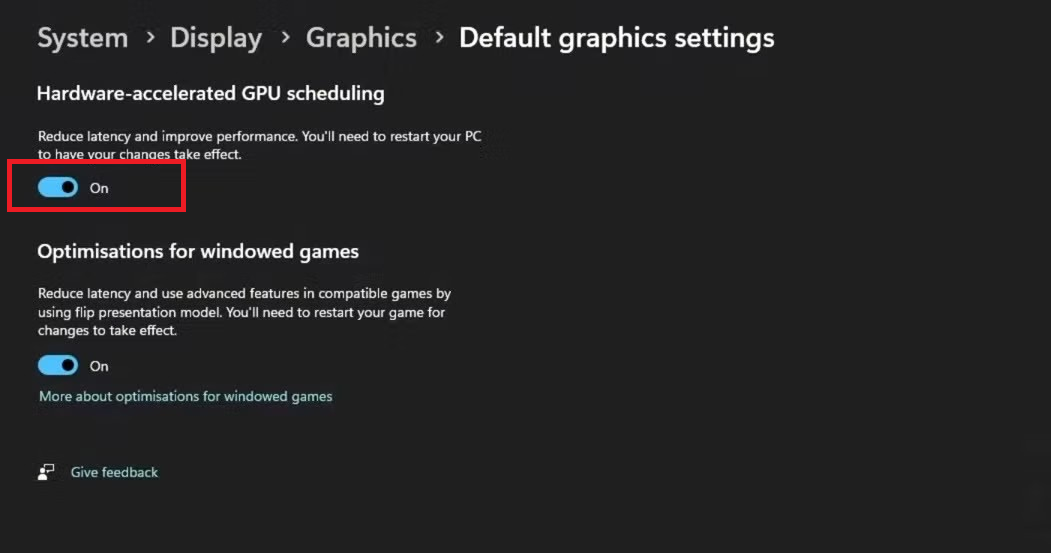
Restart your PC and check if the error has been resolved.
For Windows 10
- Go to the Settings app, select System, and then click Display.
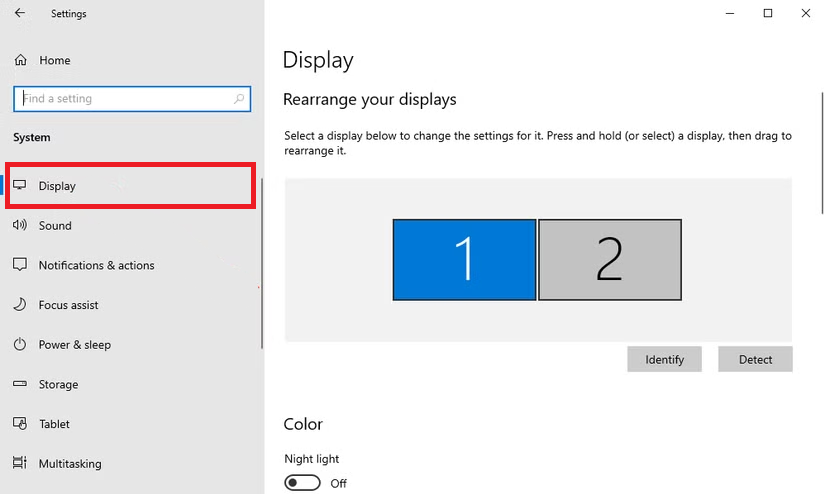
- Next, click on Graphics settings.
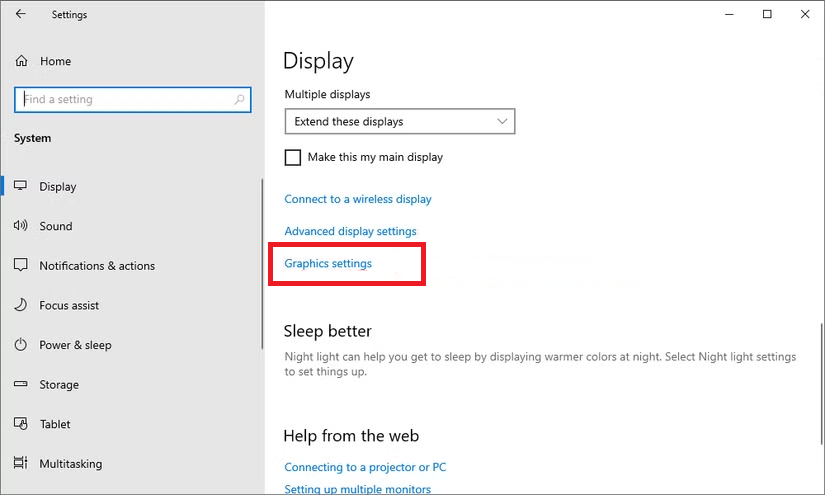
- Switch off Hardware-accelerated GPU scheduling.
Restart your computer for the changes to take effect.
Fix 8: Run the Hardware and Devices troubleshooter
The Windows Hardware and Devices troubleshooter can help you find the source of the problem and fix the DirectX error. Let’s go through the steps for Windows 10 and 11:
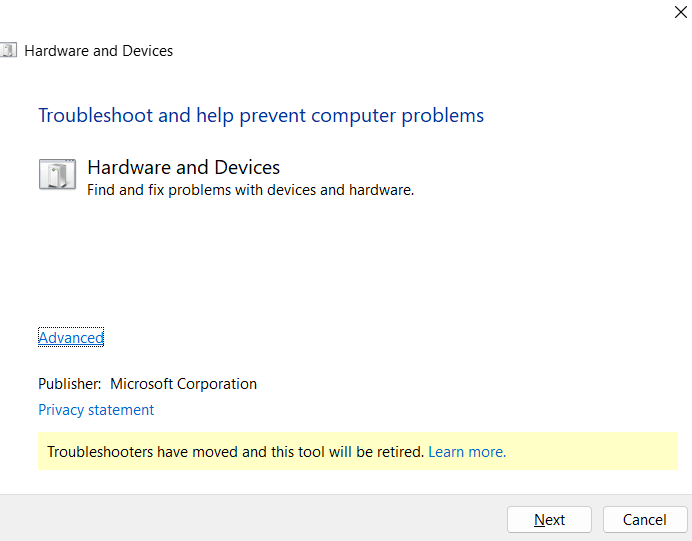
- Press the
Windows key + Rto open the Run dialog box. - Type msdt.exe -id DeviceDiagnostic and press
Enter.
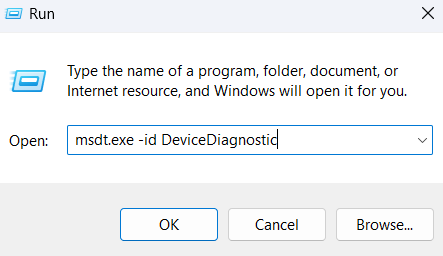
- Click Next and let the troubleshooter run and detect and fix issues with your computer hardware and devices.
Fix 9: Test a 32-bit version of the program
This is kind of a Hail Mary fix, but there’s no harm in trying out all possible avenues to resolve issues like this. First, check whether the problematic application is 64-bit. A quick way to determine this is by checking the installation location.
32-bit apps and programs go into the C:\Program Files (x86) folder by default, while 64-bit apps are usually found in the C:\Program Files folder. Of course, programs using either Windows architecture can be manually or automatically installed elsewhere.
Fix 10: Reinstall the game or application
Even though the “failed to initialize DirectX” error is usually related to your graphics and Windows miscommunication, corrupted game files or an improper installation could also be a contributing factor. You can try reinstalling the game or application to make sure any broken or missing DirectX-related files are restored. It also ensures that the program is correctly configured for compatibility for your system. Follow the steps below:
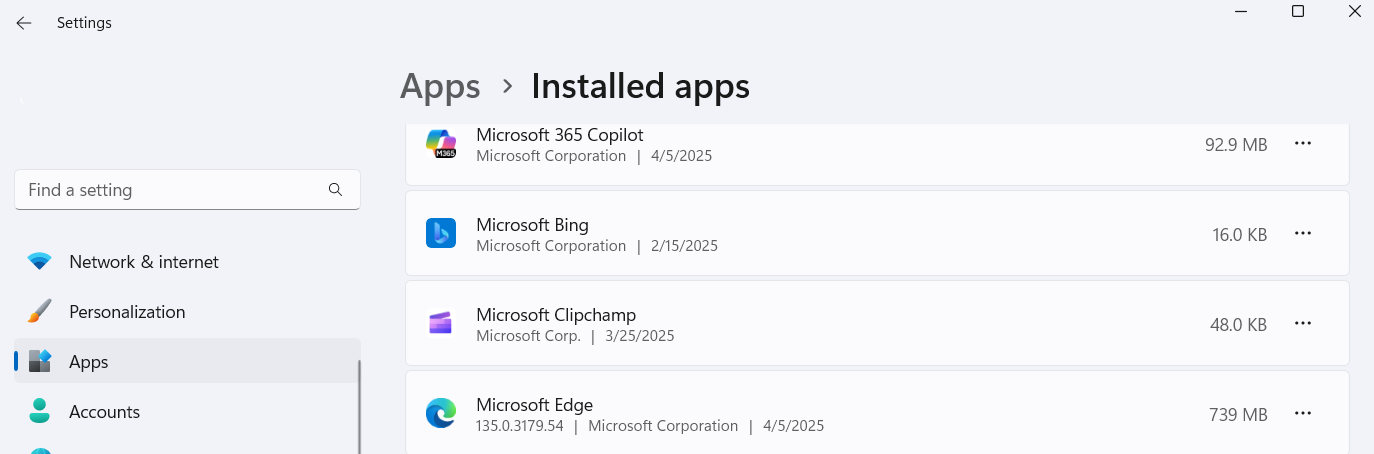
- Open your Settings app and go to Apps and click on Installed apps.
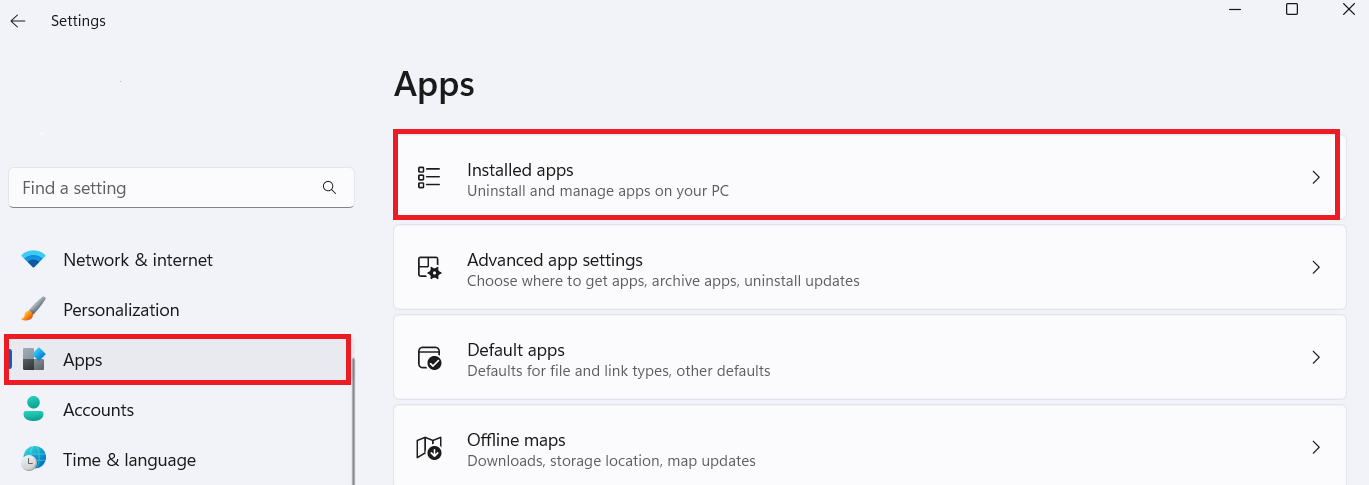
- Select the apps you want to delete, and click Uninstall. The steps are similar in Windows 10.
- Next, download the latest version of the game or application from the official website. After installation, launch the app to see if the problem is solved.
It has the Uninstall Manager feature, which allows you to uninstall programs completely and scans your system for leftover files and helps clean them up. That way, you don’t end up reinstalling a broken or cluttered version of your app.
How to Fix the DirectX Error for Specific Games on Windows PCs
In this section, I’ll cover effective DirectX repa irs for some commonly reported games facing the error and unique fixes specific to the games that are not covered in the previous section. Let’s go through them:
1. Sid Meier’s Pirates!
You might get the message “Unable to initialize DirectX” when you start Sid Meier’s Pirates! According to the Steam community, you can often fix the problem by running the game in a windowed mode instead of a full screen. Here’s how to do it:
- Go to your Documents folder, and then open this path: My Games > Sid Meier’s Pirates!
- You should see Config.ini. Double-click it to open (you can use Notepad).
So, open the folder where you’re creating the file. At the top of the window, click on the View tab and look for the File name extensions option or similar, and make sure it’s checked. After this, you should see something like Config.ini.txt. Rename it to Config.ini.
- Copy and paste this into the file:
Fullscreen = 0 ScreenWidth = 1280 ScreenHeight = 720
- Click File > Save and then close Notepad.
Start the game and see if it works.
2. Call of Duty: Black Ops 6
You might see the DirectX error in Black Ops when trying to launch or play the game, saying something like “DirectX encountered an unrecoverable error.” You might also face the following issues:
- The game crashes right after launch
- You’re stuck on a black screen or kicked out during gameplay
These issues are almost always related to how your system handles graphics, especially through DirectX. If you’ve gone through the solutions earlier, repairing your game files may fix the error. Do this:
If you’re using Battle.net:
- Open the Battle.net launcher.
- Select Call of Duty: BO6.
- Click the gear icon next to the Play button.
- Select Scan and Repair.
- Wait for it to finish and then relaunch the game.
If you’re using Steam:
- Open Steam.
- Right-click on Call of Duty: BO6, and go to Properties.
- Go to Installed Files.
- Click Verify integrity of game files.
Check to see if the DirectX error in BO6 is fixed.
3. Hogwarts Legacy
Many players trying to enjoy Hogwarts Legacy have run into an error, especially right after launching the game or during cutscenes and battles. The message might say something like “DirectX has encountered an unrecoverable error” or “DXGI_ERROR_DEVICE_HUNG.”
Here’s how to fix it:
Steam:
- Right-click Hogwarts Legacy in your library.
- Go to Properties > Installed Files.
- Click Verify integrity of game files.
Epic Games:
- Go to your Library.
- Click the three dots on Hogwarts Legacy.
- Select Manage, then click Verify.
However, even though this error differs slightly from the “Failed to initialize Direct X” error, the solutions are largely similar. If you get this error, the fixes outlined in this guide can also help resolve it.
4. League of Legends
Players often encounter a message like “An unknown DirectX error has occurred and League of Legends cannot start.”
This error occurs because LoL uses DirectX for rendering, and if the driver or config file is broken, it crashes. Another common reason for the error are background software conflicts (like overlays).
Here’s how to fix it:
- Find the folder where League of Legends is installed on your computer. It’s usually in C:\Riot Games\League of Legends, if you didn’t install it in a specific location.
- Search for the Config and Logs folders and delete them both. Deleting these folders won’t harm your game.
- After deleting the folders, open the League of Legends client again. The game will recreate the Config and Logs folders with fresh, default settings. This often clears up issues related to corrupted settings or files that were causing DirectX errors.
The “Failed to Initialize DirectX” Error: Fixed
The “DirectX failed to initialize” error can be frustrating, but with the right steps, you can often fix the problem. Start with simple solutions like updating your graphics drivers and DirectX or checking your game files for corruption. If those don’t work, you can try more involved steps like reinstalling DirectX or the game itself.
Most of the time, these methods will get you back to gaming quickly. If the problem persists, don’t hesitate to contact the game’s support team or look for advice in forums.