![[FULL GUIDE] How to Check for and Fix Corrupted Files in Windows 10/11](https://www.auslogics.com/en/articles/wp-content/uploads/2025/05/FULL-GUIDE-How-to-Check-for-and-Fix-Corrupted-Files-in-Windows-1011-568x359.webp)
Are you experiencing what seems to be an unending series of issues that make using your Windows computer a nightmare? These issues could be as a result of corrupt system files.
We’ll show you how to check for corrupted files in Windows 11, or any other version of Windows you might be using, and fix them.
You may have tried a number of troubleshooting steps to get your PC functioning normally again, but nothing appears to be working. Might even have gotten to a point where the OS isn’t booting up anymore.
Fortunately, Microsoft has provided a few handy built-in tools that enable users to repair their installed copy of Windows without the need for a refresh or a reinstall that would wipe all their data.
The System File Checker (SFC), popularly known as the SFC /scannow command, along with the Deployment Image Servicing and Management (DISM) tool, should always be the first port of call to find and fix corrupted files. Check Disk (CHKDSK) may then follow, if necessary, to fix possible faults in the system drive, which may be preventing Windows from accessing crucial files.
If your PC isn’t booting up at all, we’ll also show you how to use Startup Repair to replace corrupted files and set everything straight.
Some readers might snort derisively at the mention of the System File Checker on Windows 10/11 because, in their experience, it hardly ever works. And sometimes, DISM might fail too.
But that’s because they are probably not using the right technique. Therefore, we’ll show you how to run an SFC scan and use the DISM tool the right way, making absolutely certain that all corrupted files will be fixed successfully without any tedious manual processes.
But first, let’s learn what corrupted files in Windows are and what brings about these corruptions so that you can better avoid them.
What Is a Corrupt File in Windows?
A corrupted file in Windows is a system file required by the OS to function properly but which no longer serves as intended due to damage or alteration. Its contents may be partially or wholly unreadable or unusable by the Windows component designed to open or execute it.
Corruption can manifest in various ways when the operating system tries to interact with the file. The OS may fail to recognize the file as a valid format, or the content may be garbled. These then lead to app and system faults.
What Causes Corrupted Files?
Several system and hardware issues, as well as certain user activities, lead to system file corruption on Windows PCs.
Understanding these underlying causes can help you troubleshoot and prevent the problem. Let’s go through them:
- Faulty storage media: Storage devices, such as SSDs, hard drives, USB drives, and optical disks, often develop issues, such as bad sectors (or blocks), that can lead to file corruption. Storage drives generally have more problems as they age.
- Faulty RAM: A malfunctioning RAM can corrupt files during read/write operations.
- Overheating can cause various hardware components, such as your RAM and storage devices, to malfunction. The risk of corrupted files significantly increases as these devices are exposed to heat.
- Improper power supply and shutdown: Sudden power surges or losses can interrupt write operations and corrupt files being modified or downloaded to your drive. Shutting down the computer without closing programs properly can also cause corruption.
- Software glitches: Sometimes, software bugs can lead to file corruption, especially if there’s an issue during a save operation.
- Malware: Viruses and different forms of malware can alter file structure and mess up important software components as part of their malicious operations.
- Network transmission errors: Corruption may occur if your network connection is abruptly cut off while downloading files.
- Editing file structure: Modifying system files without understanding their structure or purpose can lead to corruption.
- Magnetic interference: Strong magnetic fields can affect traditional hard drives and corrupt the data stored on them.
- Full disk: If a disk becomes full while a file is being written, the interruption can corrupt the file.
- Physical damage: Physical shocks, exposure to extreme temperatures, or water damage can affect storage devices and corrupt files.
- Failed updates: An interrupted or failed OS or program update can corrupt system and application files.
- Conflicts and bugs: OS-level conflicts or bugs can also result in system file corruption.
- Compression errors: Files that are compressed and then decompressed might not always return to their original state.
How to Fix Corrupted Files in Windows 11 and Windows 10
More than a few methods exist that will enable you to fix corrupted files in Windows. This table shows you the method that will best fit your particular scenario:
| Method | Best used | Level of ease |
|---|---|---|
| System File Checker (SFC) | As the first port of call when there’s suspicion of corrupt system files on your PC | Easy |
| Deployment Image Servicing and Management (DISM) | When SFC reports that some corrupt files could not be fixed, DISM updates the system file image, providing SFC with all the required replacement files | Moderately easy to advanced |
| Check Disk (CHKDSK) | To repair the system drive, fostering ease of access to crucial system files | Easy |
How to fix corrupted files in Windows 10/11 using the System File Checker
The System File Checker is a command-line tool native to Windows operating systems. It is designed to check the integrity of system files and replace those that are damaged or missing with cached copies stored in the System32 directory on your C drive. It is the primary tool for resolving system file corruption on any Windows computer.
Here’s how to run the System File Checker on Windows 10/11:
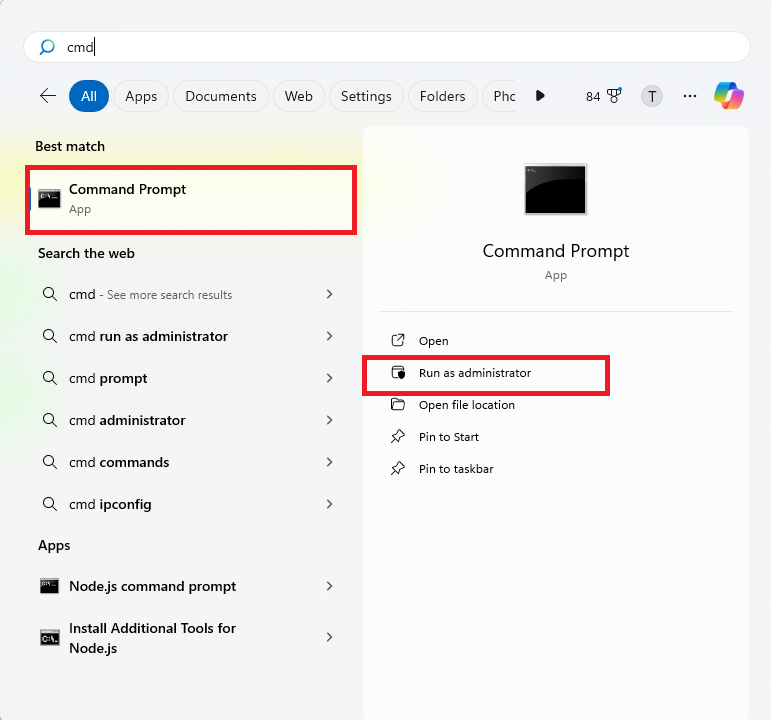
- Click the Windows icon on your taskbar to open the Start menu. Then type cmd and click on Run as administrator. Click Yes on the User Account Control prompt to confirm the action.
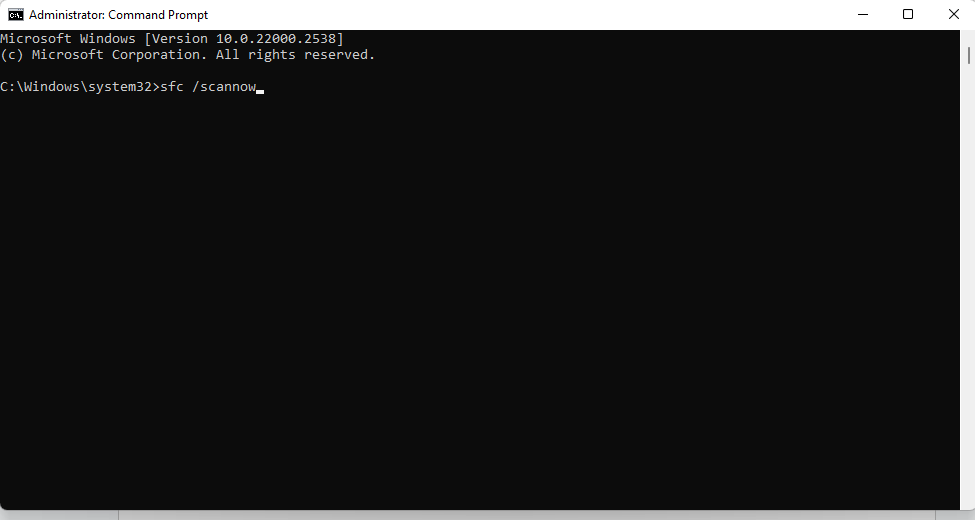
- Type SFC /scannow into the Administrator: Command Prompt window and hit
Enteron your keyboard.
- The process will take a while to complete.
The SFC tool allows scanning drives other than the C: drive. This comes in handy if you’ve installed Windows on an external drive. Follow these steps:
- Connect the drive to your computer.
- Open the Command Prompt as an administrator.
- Now run the following command:
SFC /scannow /offbootdir=driveletter\ /offwindir=driveletter\windows
Note: Ensure that you replace driveletter with the external drive’s drive letter. It could be E: or F:, and the command should look like this:
SFC /scannow /offbootdir=E:\ /offwindir=D:\windows
Interpreting SFC results
After running the SFC /scannow command, the Command Prompt will return one of the following results:
| Result | Meaning |
|---|---|
| Windows Resource Protection did not find any integrity violations | This indicates that there are no missing or corrupted system files on your computer. Everything is in order. |
| Windows Resource Protection could not perform the requested operation | This reveals that an unknown occurrence is preventing the System File Checker scan from executing. You can fix this by running SFC /scannow in Safe Mode. Check out this guide. |
| Windows Resource Protection found corrupt files and successfully repaired them | The SFC /scannow command executed successfully. All corrupt system files have been replaced. You can now check whether the error you were experiencing on your PC has been resolved. |
| Windows Resource Protection found corrupt files but was unable to fix some of them | SFC has confirmed the existence of corrupt Windows files on your PC but is unable to fix them due to the absence of the required replacement files. |
See the DISM section below to learn why.
It’s often preferable to run the DISM tool first, after which you can then implement the SFC /scannow command.
How to check for corrupted files in Windows 11/10 using DISM
We earlier mentioned that the SFC /scannow command replaces corrupted system files with healthy copies that are stored in the System32 directory.
Now, these cached copies, in their entirety, referred to as the system file image, may not always be up to date with your current Windows build. They might even be corrupted themselves. That’s why SFC often fails, presenting you with the result that says, “Windows Resource Protection found corrupt files but was unable to fix some of them.”
It’s possible to comb through the SFC scan logs to determine which corrupt system files SFC couldn’t fix, and then try to replace them manually with the correct versions for your particular build of Windows. But that is not advisable, as it is a highly tedious task, and we won’t be doing that here.
Instead, we will employ the DISM tool to update the system file image so that SFC can do its job successfully.
Follow these steps to run the DISM tool:
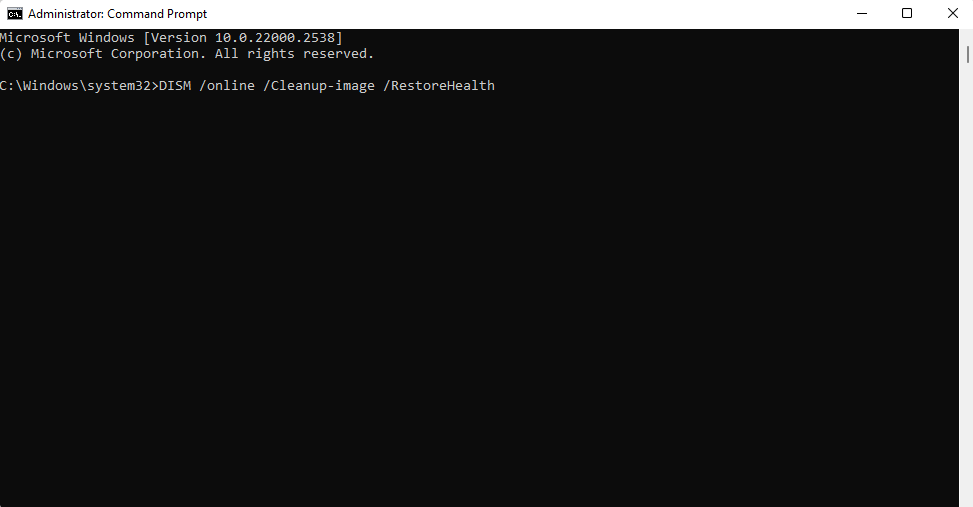
- Open the Administrator: Command Prompt window as previously shown.
- Type DISM /online /Cleanup-image /RestoreHealth and hit
Enterto run a thorough scan to check whether the system file cache is healthy and up to date. If it finds any corruption or outdated files, it goes ahead to load up the correct replacements.
- After the DISM tool successfully updates the system file image, you can then run SFC /scannow, and it will return a positive result.
What if DISM fails to fix the system file image?
If that happens, you can specify a source from which the DISM tool can get all the required system file replacements.
Here’s how:
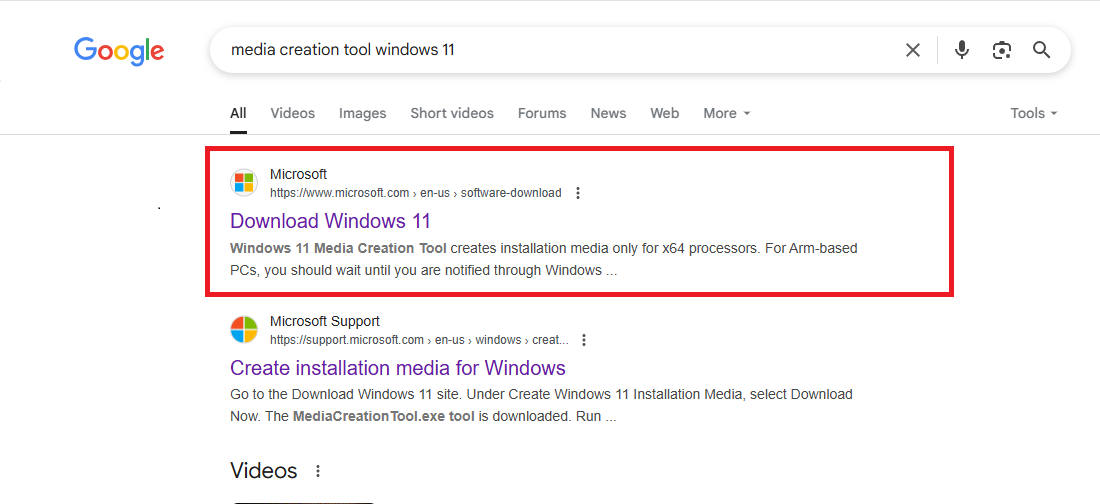
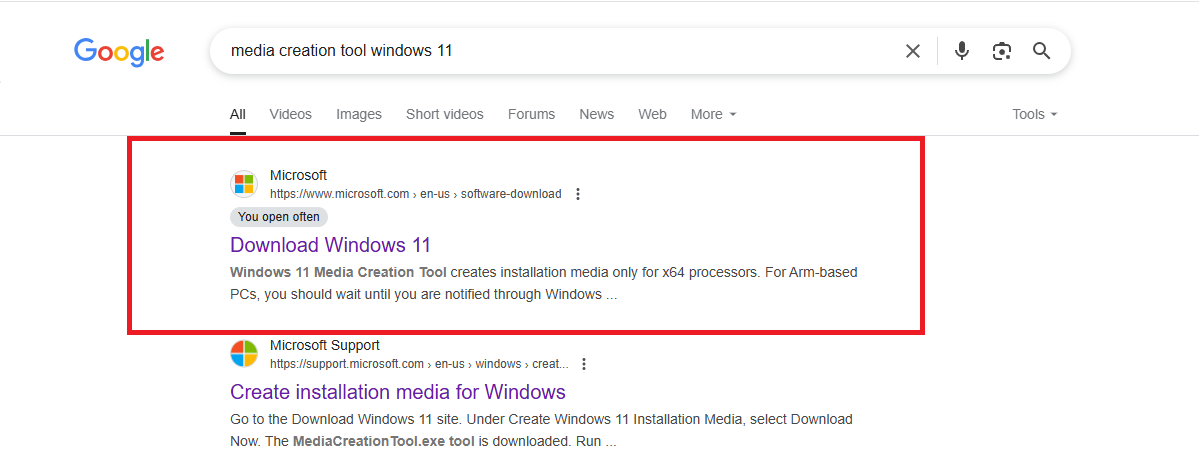
- Open up your browser and run a search for media creation tool on Google. Indicate your version of Windows, like so: media creation tool Windows 11 or media creation tool Windows 10.
- Click on the top result, which should be the Microsoft.com software download link.
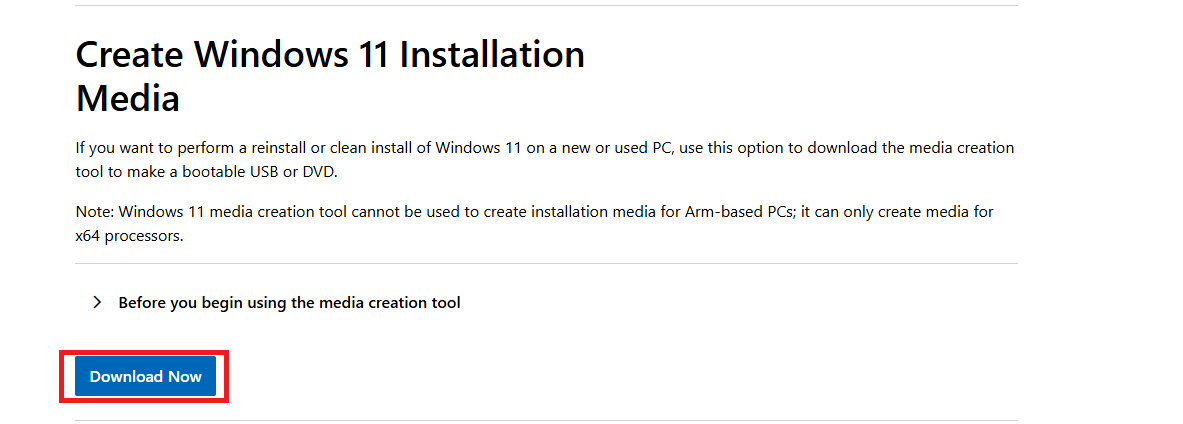
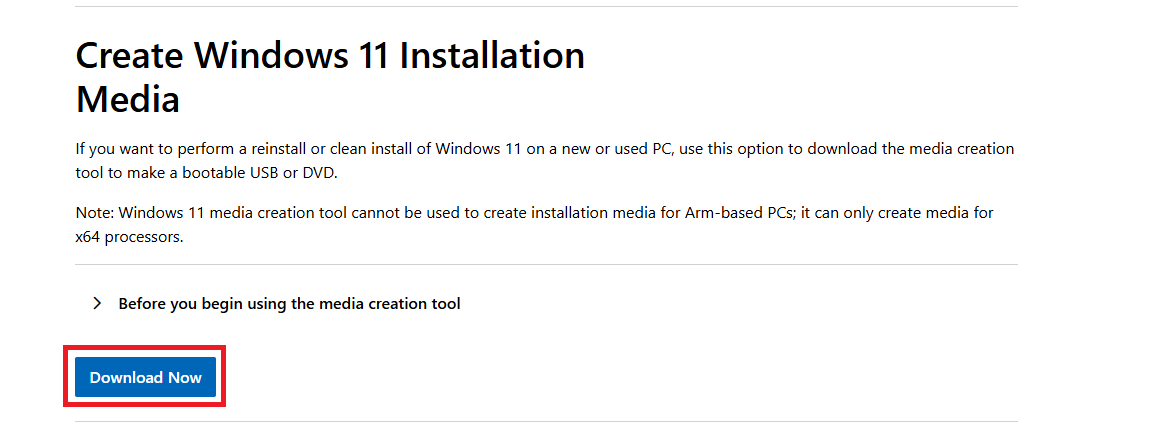
- On the page, scroll down to Create Windows 11 (Windows 10) Installation Media and click Download Now.
- Run the downloaded file and click Yes on the User Account Control prompt.
- It might take some time for the setup to get things ready.
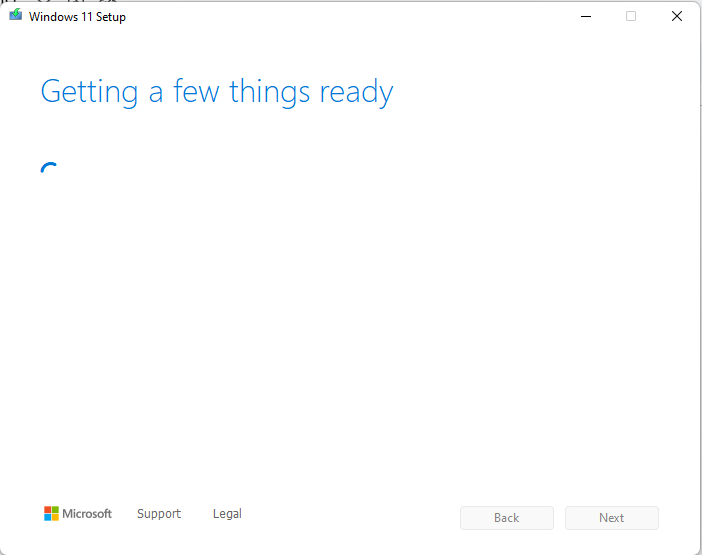
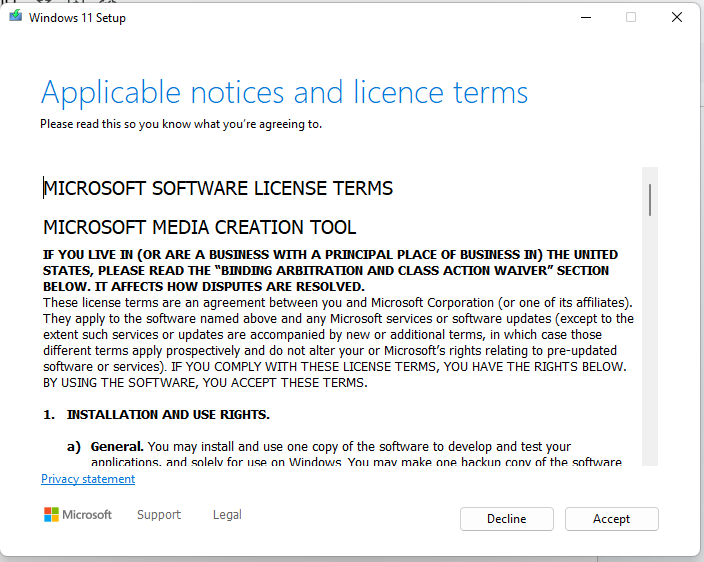
- Click Accept on the license terms and then wait some more as the setup continues getting things ready.
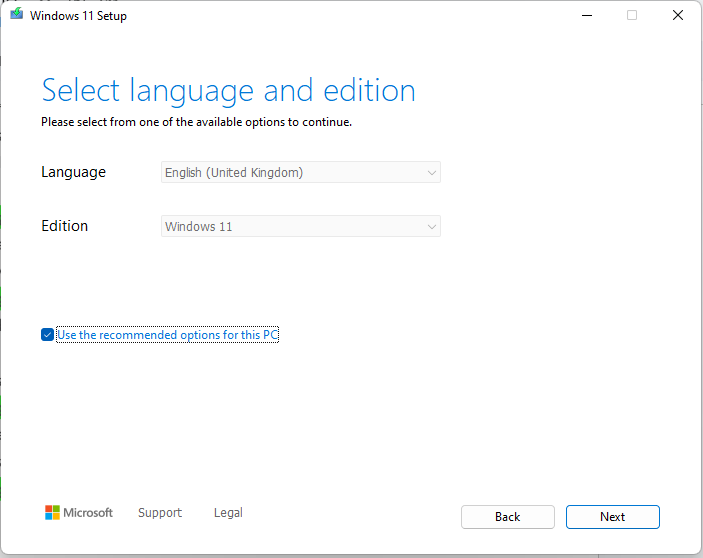
- Click Next on the Select language and edition page.
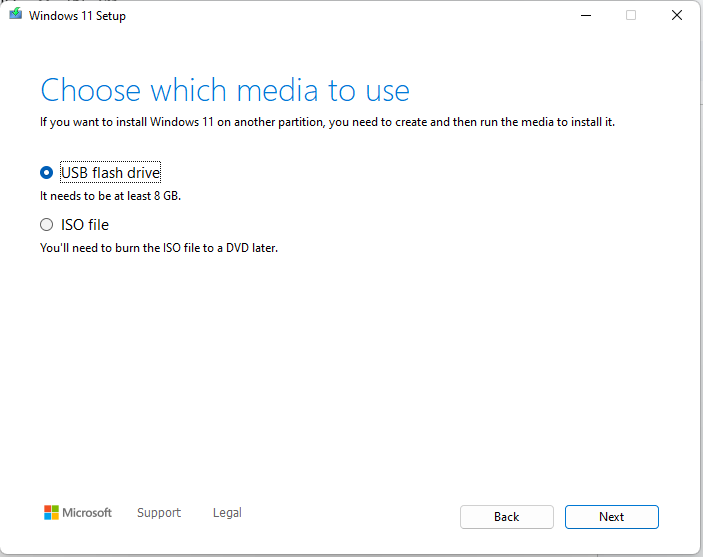
- Select ISO file on the Choose which media to use page and click Next.
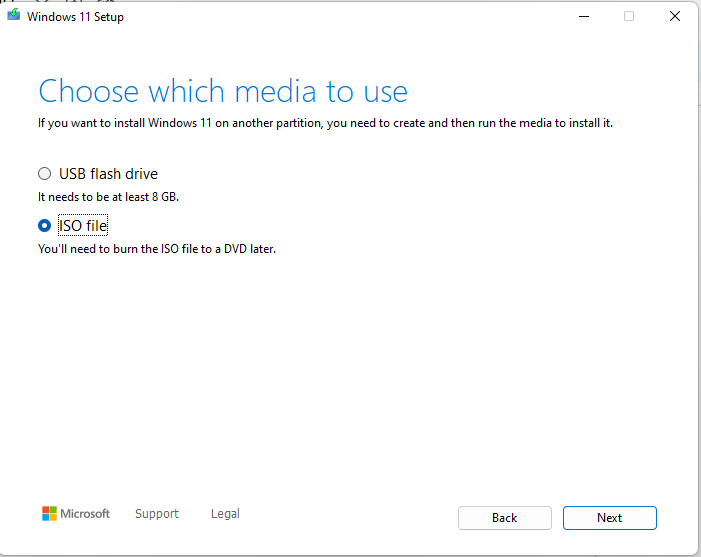
Select a location on your computer to download the ISO file, click Save, and then wait for the download to complete.
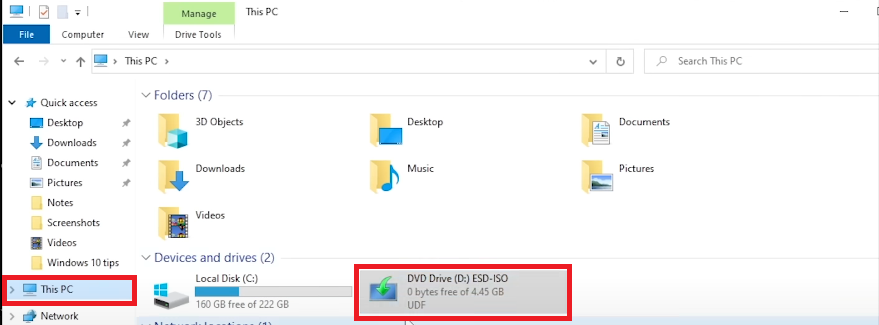
- Now, go to the download location and double-click on the downloaded Windows disk image file.
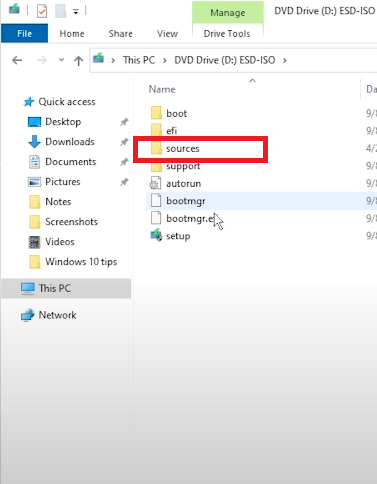
- Open the sources folder.
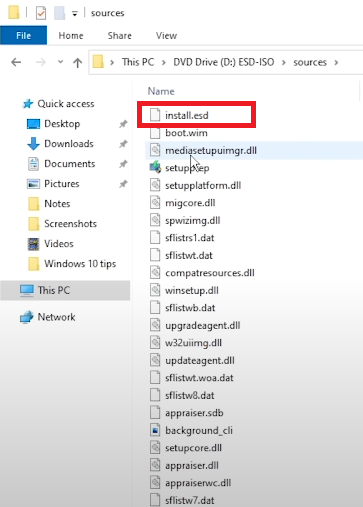
- Locate the install.esd file. It could also be listed as install.wim. Right-click on it and click Copy as path.
- Go back to the Administrator: Command Prompt window and press the up arrow key on your keyboard to load the last command you ran so you won’t have to type it again. The last command was DISM /online /Cleanup-image /RestoreHealth. We’ll now add new parameters to it so it becomes: DISM /online /Cleanup-image /RestoreHealth /Source:{Path to esd or wim file} /LimitAccess
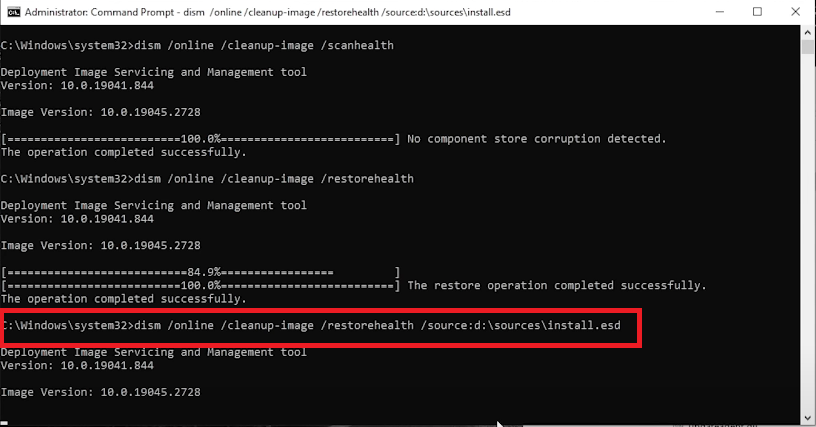
- Hit
Enterto run it.
After the process completes successfully, run SFC /scannow to get the desired positive result.
How to scan and fix a drive using CHKDSK
SFC should be sufficient in resolving the errors on your computer. But if by any chance you’re still experiencing some issues, then try the Check Disk tool. It will scan your system drive to:
- Detect and resolve any file system errors that may cause inconsistencies in the way data is organized and retrieved from the drive.
- Check for damaged or bad sectors in the disk and try recovering the data from them.
- Prevent the operating system from accessing the bad sectors.
- Check for lost clusters that appear to be in use by files and directories but are really not. This happens when the actual data on the disk does not synchronize with the file system’s records due to program crashes, power outages, and other sorts of disruptions.
Resolving all these issues makes it possible for Windows to readily access needed files.
Follow these steps to run CHKDSK in Windows 10/11:
- First of all, you want to back up all your important files.
- Open File Explorer—press the
Windows + Ehotkey. - Right-click on the system drive (Local Disk (C:)) and click on Properties.
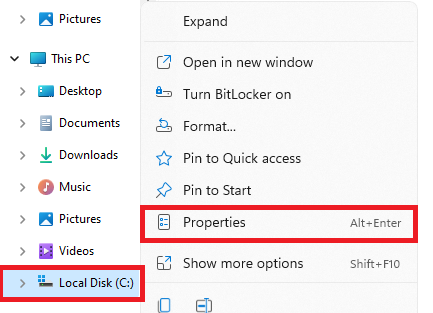
- Switch to the Tools tab and click Check. The system will let you know whether the drive actually requires scanning. You don’t have to start the scan if there are no issues.

Advanced Methods: How to Fix a Corrupted File on Windows 10/11
Apart from running the System File Checker, there are other ways to address corrupted system files on a Windows PC, especially if you can’t boot into Windows. In that case, Startup Repair is the best method to rely on. But there are also other available methods that may serve. Take a look:
| Method | Reason | Difficulty level |
|---|---|---|
| Windows Startup Repair | When the PC cannot boot, Startup Repair becomes the first port of call in place of SFC. | Advanced |
| System Restore | There are available restore points, and you don’t mind losing recently installed software and system settings. | Moderately easy to advanced |
| System image recovery | You’ve previously created a Windows image backup. User files can also be restored. | Moderately easy to advanced |
| Windows reset | As a last resort, when no other option seems suitable. | Easy |
Run Startup Repair to fix corrupted files
If your system isn’t booting up at all, Startup Repair comes in handy and is highly recommended for fixing various issues that prevent Windows from starting properly, including corrupt system files. It runs via Windows Recovery Environment (WinRE). This is the best method to rely on when your PC won’t boot.
How to effectively run Startup Repair in Windows:
Before we start, you will need an NTFS-formatted USB flash drive to create Windows installation media.
Follow these steps to do so:
- Open the browser on a working PC and run a search for media creation tool Windows 11 or media creation tool Windows 10.
- Click on the top result to open the Microsoft software download page.
- Scroll down to Create Windows 11 Installation Media and click Download.
- Once the download is complete, double-click on it to launch it and click Yes on the User Account Control prompt.
- Accept the license agreement.
- Click Next on the Select language and edition page.
- Select USB flash drive under Choose which media to use and click Next.
- Select your connected USB and click Next.
- Click Finish when the setup is complete.
After you’ve created the installation media, check your PC or motherboard manual to learn how to change your UEFI/BIOS settings so that your faulty PC can boot from a USB drive (known as changing the boot order). Don’t worry. It is easy to do.
You can also check out this infographic to see how to enter the BIOS/UEFI environment for your specific brand:
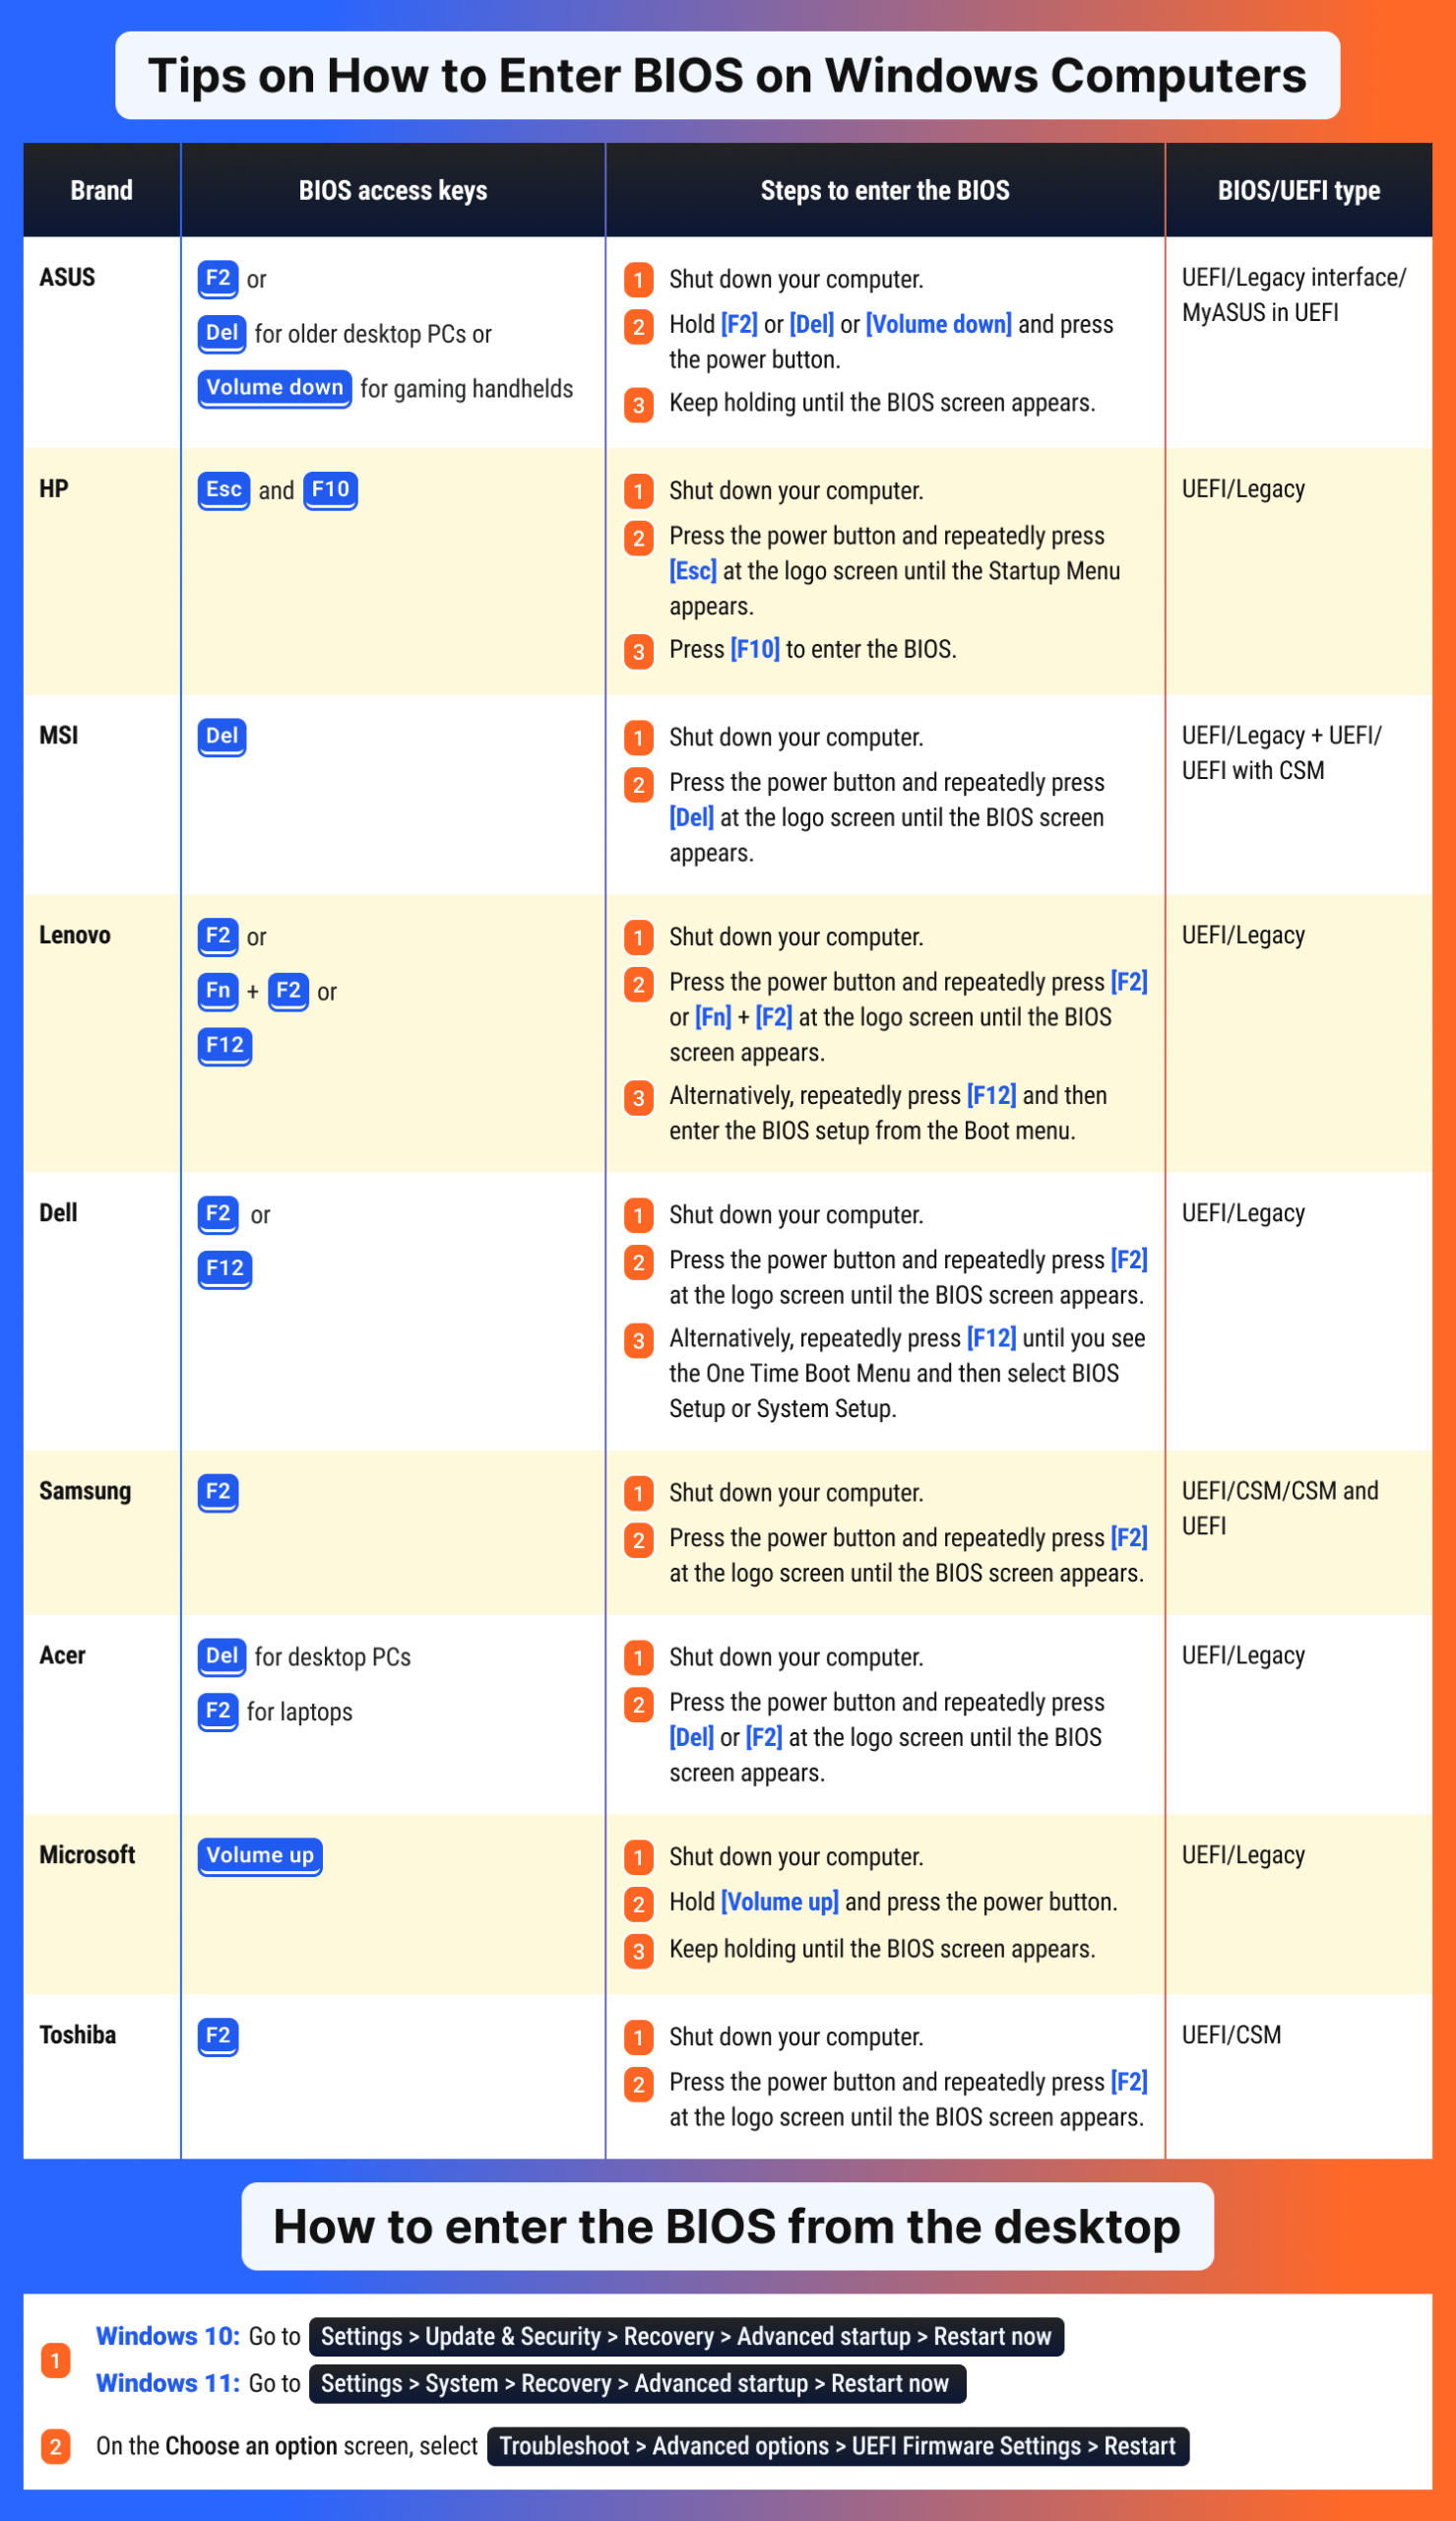
Once done, continue with the steps below:
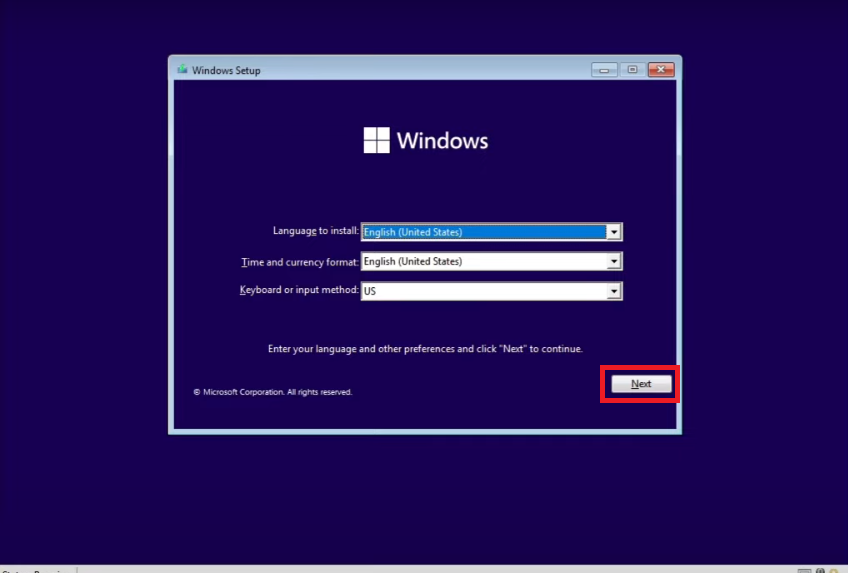
- Once you’ve booted the computer from the USB, you’ll see a window like in this image. Click Next.
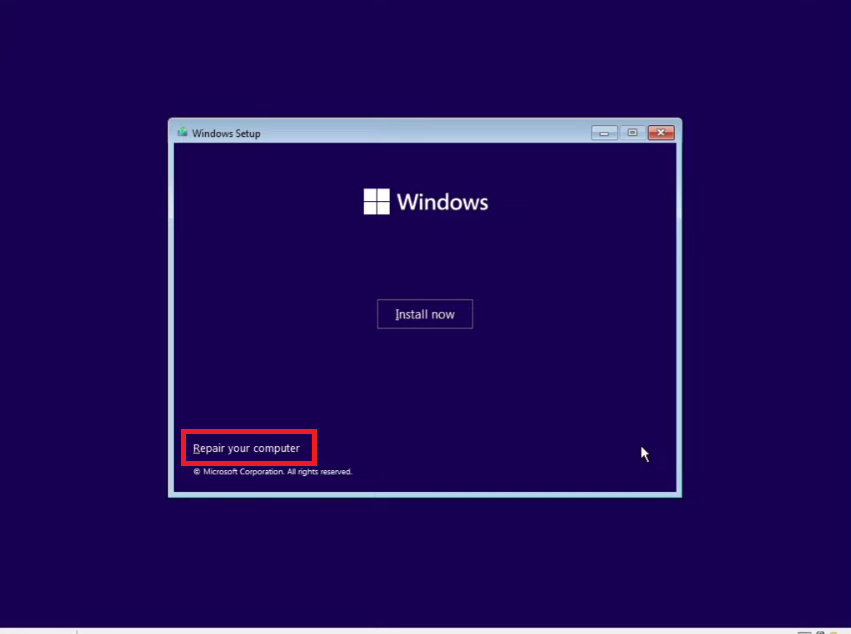
- Click on Repair your computer.
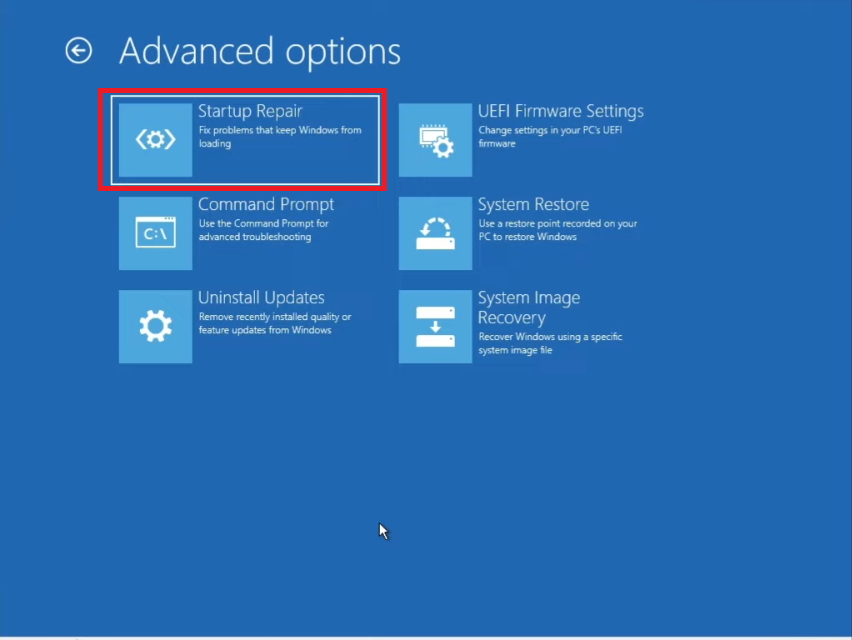
- Click on Troubleshoot.

- Click on Startup Repair.
- Choose your target operating system, in this case, Windows 11.
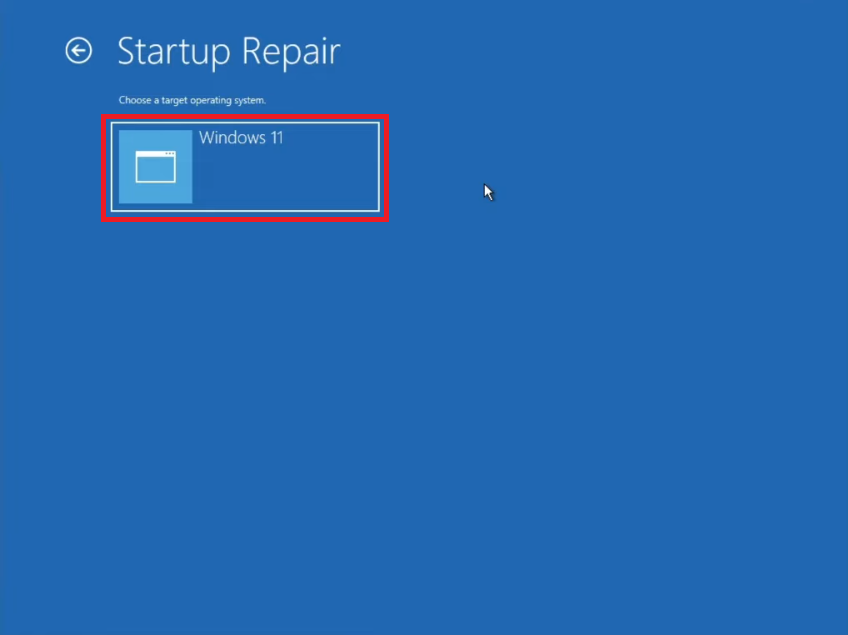
- Wait for the tool to diagnose your PC and resolve Windows issues, including corrupt system files.
- Reboot your PC, and it should be able to boot into Windows now.
Run System Restore to regain corrupted files
The System Restore tool makes it possible to revert the system to a previous working state. It comes in handy if you have enabled the Windows System Protection feature and created a restore point.
Creating a restore point takes a snapshot of the entire system configuration, including the Windows registry, system settings, installed applications and drivers, and, of course, system files at a specific point in time when the PC is in good working condition.
This allows you to activate the snapshot when things later go wrong and roll the system back to that very same optimal state:
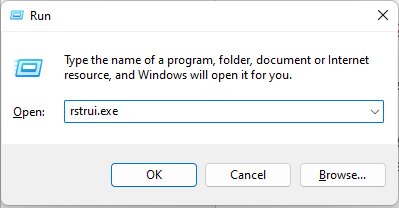
- Press the
Windows + Rhotkey to quickly open the Run dialog. - Type rstrui.exe into the text box and hit
Enter.
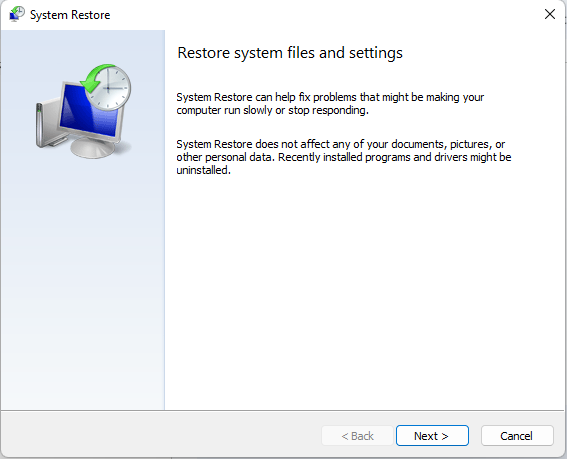
- Click Next on the Restore system files and settings page.
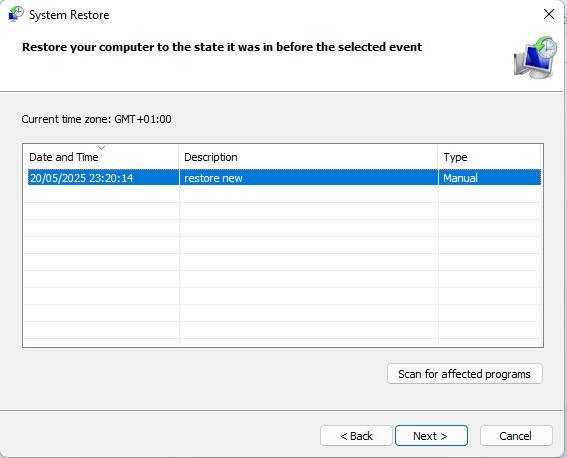
- Select a restore point, and click Next.
- Confirm your chosen restore point and click Finish.
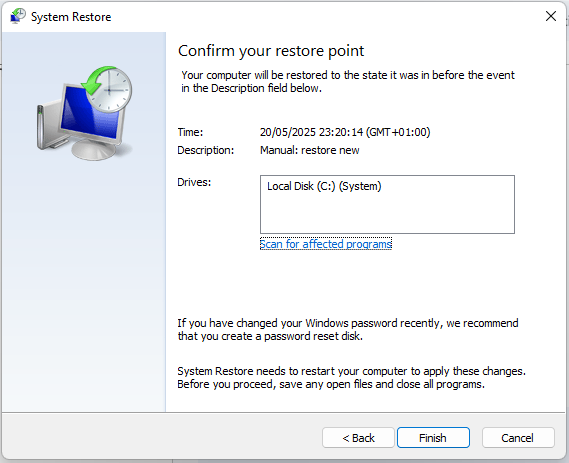
- Your computer will restart to apply all the changes.
If you can’t boot into Windows, follow these steps:
- Get into Windows Recovery Environment.
- Navigate to Troubleshoot > Advanced options > System Restore.
- Follow the system prompts to complete the process.
Restore system files using a system image backup
Creating a file that keeps the complete image of Windows is one of the little-known ways of safeguarding your system files so that you can recover them when needed.
This is similar to creating a system restore point, only that the backups must always be initiated manually and stored externally on a network or a drive, which makes it safer. And unlike System Restore, it can also back up your personal files.
Thus, if you previously backed up Windows using the new Windows Backup utility, the legacy Windows 7 Backup and Restore tool (still available on Windows 10 and 11), or a third-party program, you can restore the backup to replace the faulty system files:
- Plug in the external drive that contains the system image backup file.
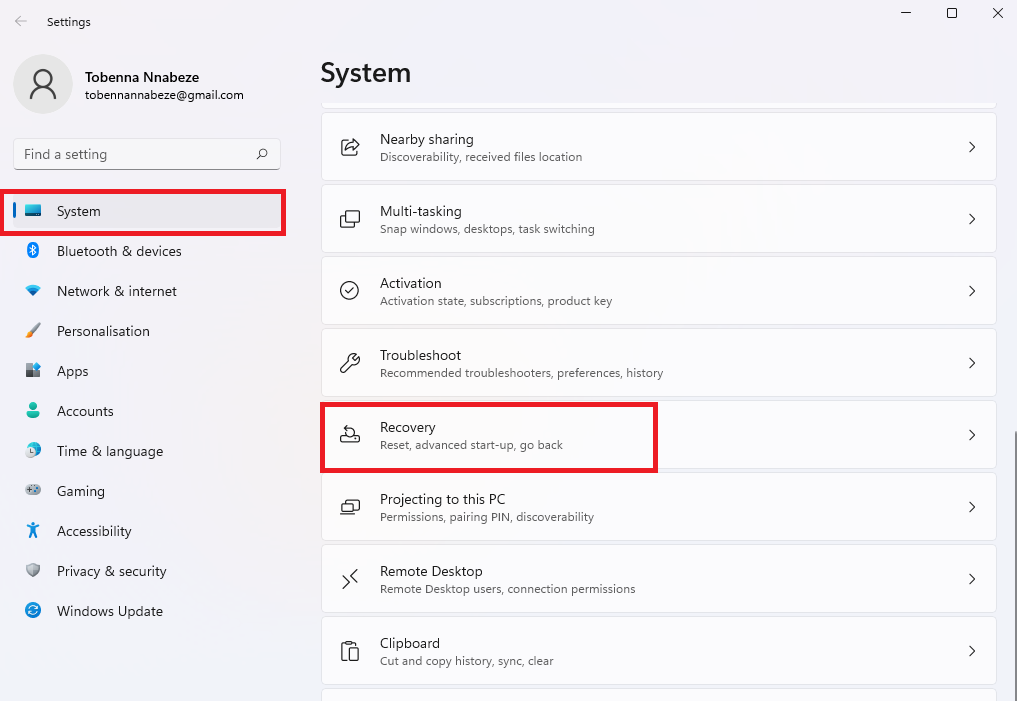
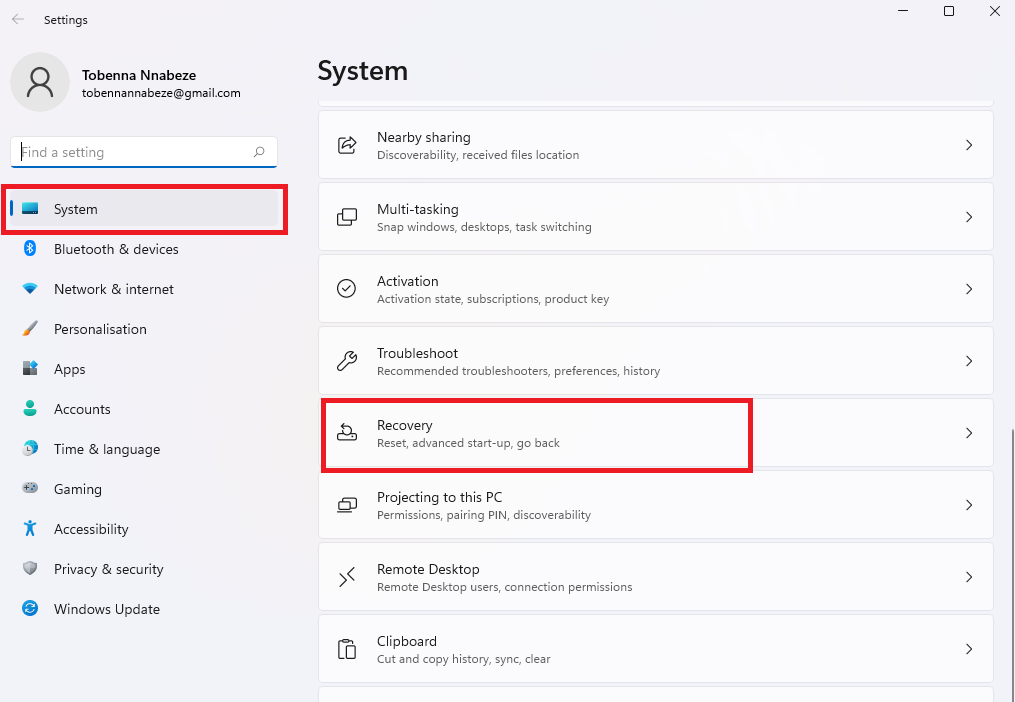
- Open the Settings app and see that System is selected in the left pane.
- Scroll down the main window and click on Recovery.
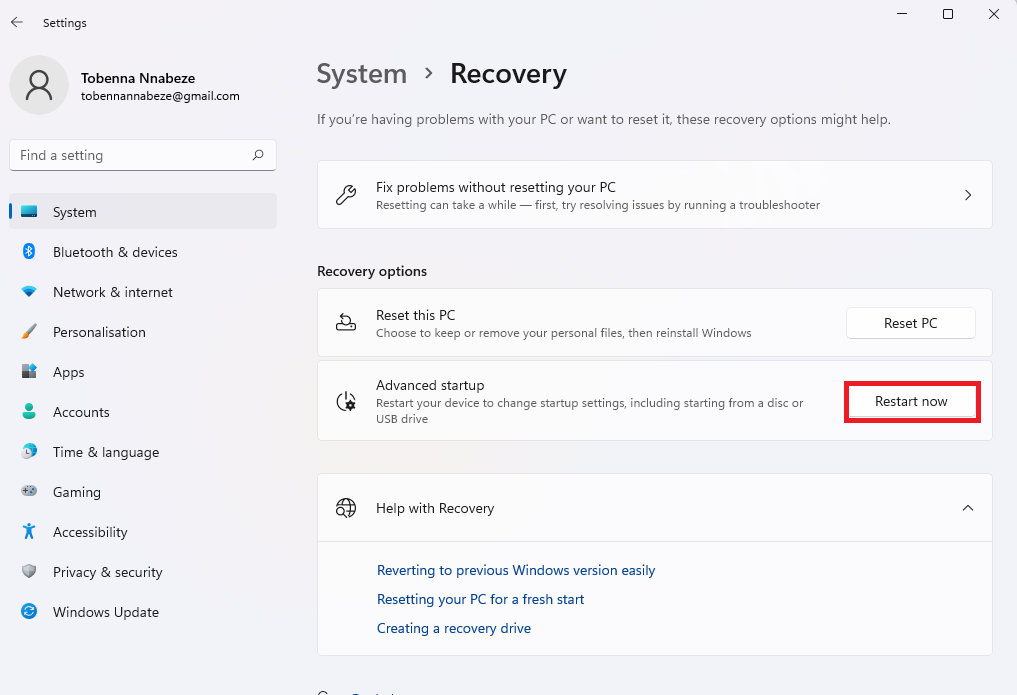
- Click on Restart now next to Advanced startup.
- Check your PC or motherboard instructions to learn how to change the boot order in your BIOS settings.
- Connect the external drive on which you saved your Windows backup file, then turn on your PC. It will boot into Windows Setup.
- Select Repair your PC and then continue with the steps below to restore your backup.
- Click on Troubleshoot > Advanced options > System Image Recovery.
- Windows will detect the saved system image, or you can select it yourself.
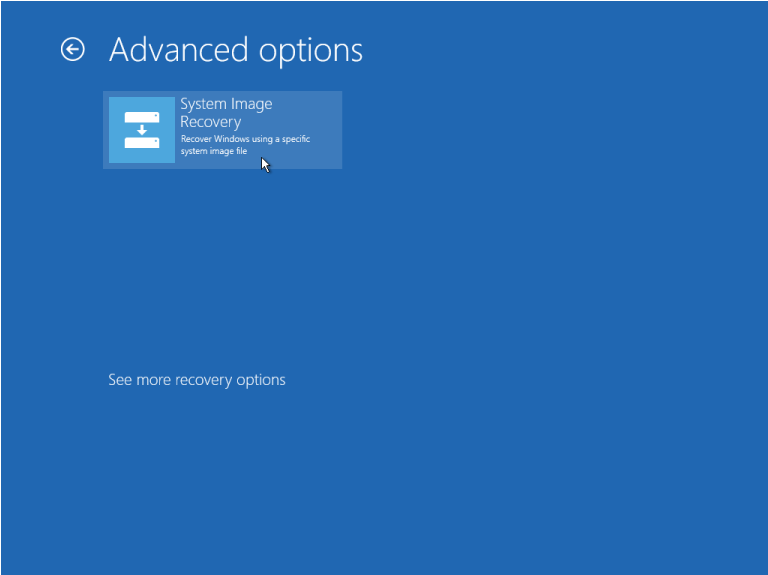
- Follow the prompts to complete the process.
A faulty or inefficient RAM leads to lags and crashes that may ultimately result in damaged system files. That’s why it’s important to check for memory issues using the Windows Memory Diagnostics tool.
Although this won’t do anything to resolve already corrupted system files, it will go a long way in preventing further corruption, especially after you’ve made progress with restoring corrupt files.
Reset Windows
A Windows reset, also known as a factory reset, is an extreme action as far as troubleshooting procedures go. It completely reinstalls Windows and restores the default settings.
But since Windows is a highly repairable operating system, it is hardly necessary to reset your PC and wipe off all your data. SFC and DISM, as well as Startup Repair, make it possible to use the system file image to easily resolve errors, so you won’t have to do a reinstall.
However, if nothing else has worked at this point, then a reset might actually be necessary.
Fortunately, there’s a reset option that lets you keep your personal files so they won’t be wiped from the storage drive during the Windows reinstallation. But you may still want to back up all your important personal files and documents before you proceed.
Here’s how to reset Windows 10/11:
- Open the Settings app by pressing the
Win + Ihotkey. - See that System is selected on the left pane. If you’re on Windows 10, click Update & Security.
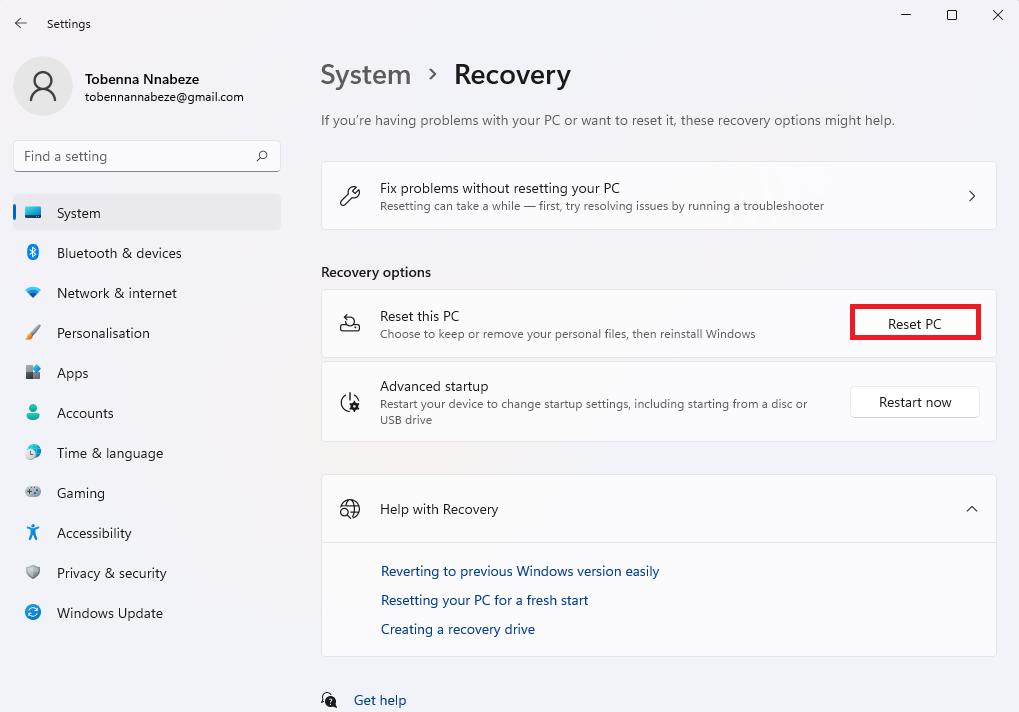
- Scroll down the main window. Click on Recovery if you’re running Windows 11. Select Recovery in the left pane of the Update & Security page if you’re on Windows 10.
- Click on Reset PC or Get started under Reset this PC.
- You can select either Keep my files or Remove everything.
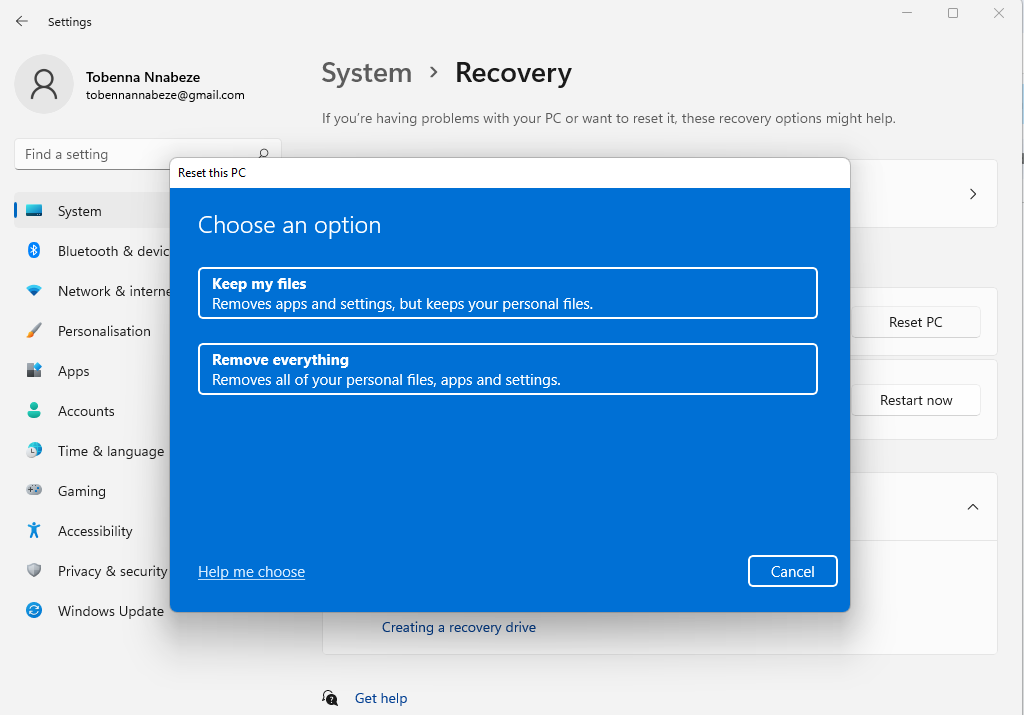
Follow the system prompts to complete the process.
If your PC won’t boot, follow these steps to reset your PC:
- Get into Windows Recovery Environment.
- Navigate to Troubleshoot > Reset this PC.
- Follow the prompts to complete the process.
Conclusion
In case it wasn’t evident enough, the methods presented in this guide show how to fix corrupted files in Windows 11 and Windows 10.
With the exception of restoring a system image backup, which may also restore your personal files if they existed at the time of the backup, all the other methods have nothing to do with fixing corrupted personal files (pictures, videos, documents, and the like). They only replace or recover Windows system files.
That being said, it is easy to fix corrupted files in Windows. All you have to do is run the System File Checker and DISM the right way, as shown here. That’s the first and best method in the hierarchy of troubleshooting procedures.
If, however, your PC is unable to boot, Windows Startup Repair is most suitable for replacing corrupt and missing system files. It will also resolve other issues that may be preventing your PC from booting.
We hope you’ve benefited from this guide and that it has helped you step out of a difficult situation. Feel free to leave a like and a comment. Don’t forget to share these solutions with your friends and colleagues.