
If you want to know how to turn off Sticky Keys , this guide is for you. Even though this accessibility feature can be helpful, some users find it difficult to turn it off. Other users don’t have any use for the accessibility feature. If you’re one of them, this guide will show you how to disable Sticky Keys.
Let’s begin.
What Are Sticky Keys?
What does Sticky Keys do? It’s an accessibility feature that allows you to perform keyboard commands with fewer keystrokes.
For example, you can press Alt first, then Ctrl, and finally Del one after the other instead of simultaneously pressing Alt + Ctrl + Del.
Here’s another example: normally, you’d press Ctrl + Shift + Escat the same time to open the Task Manager . But, with this accessibility feature turned on, you can press them one at a time.
How to Turn Off Sticky Keys on Windows 11 and 10
If you want to learn how to turn off Sticky Keys on Windows 10 and 11, follow the steps below:
Method 1: Use keyboard shortcuts
The easiest way to learn how to remove Sticky Keys is to use the keyboard shortcut. Just press the “Shift” key five times to disable this accessibility feature.
Alternatively, you can press two of the following keys simultaneously: Alt, Shift, Ctrl, or Windows key.
Related:[FIXED] Why Is My Keyboard Typing the Wrong Letters?
Method 2: Use Control Panel
Control Panel is another way to turn off the accessibility feature. Here’s how to turn off Sticky Keys:
- Type Control Panel in the search bar and click to open.

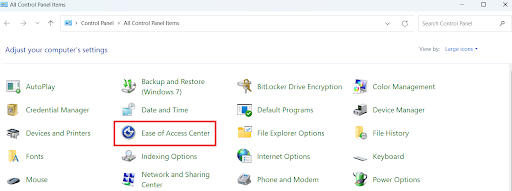
- Click the drop-down menu beside View by and select Large icons from the list of options.
- Select Ease of Access Center.
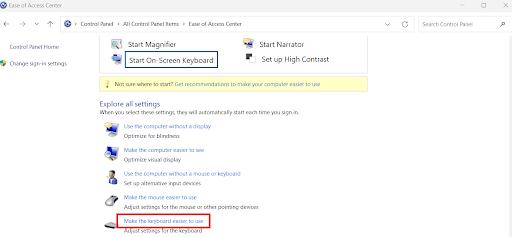
- Select Make the keyboard easier to use.
- Uncheck the box for Turn on Sticky Keys and select Apply and OK to save the changes.
After saving the changes, the feature will be turned off.
Related:Windows 10 Control Panel: Where to Find It
Method 3: Use the Settings app
Here’s how to turn off Sticky Keys using the Settings app:
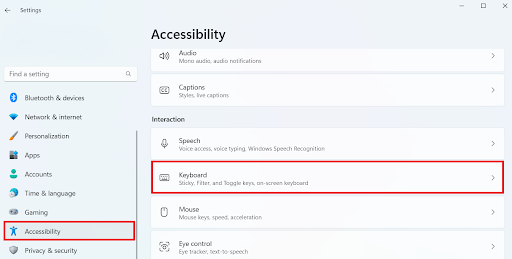
- Press
Windows + Ito open the Settings window. - Click Accessibility and select Keyboard.
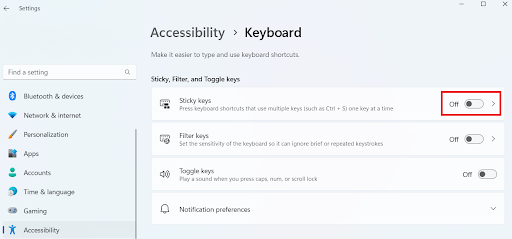
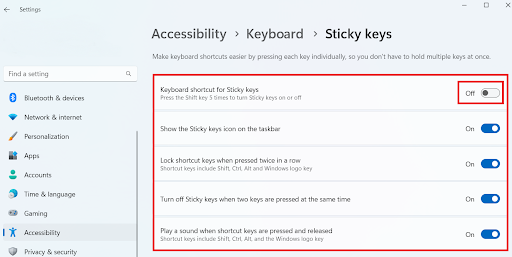
- Click the toggle beside Sticky Keys to disable the feature.
- You can further customize this feature by clicking the enter tab or the forward arrow.

- You’ll find self-explanatory individual preferences. Go through them and disable the preference you don’t want.
Method 4: Use the registry
You can also learn how to disable Sticky Keys using the registry. Here’s how to do it:
It can even cause your system to be unstable or fail to boot properly. But if you decide to proceed, back up your data.
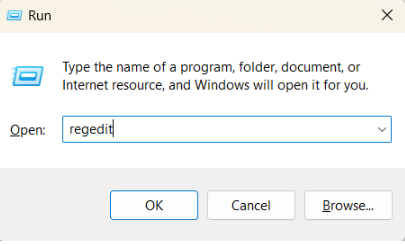
- Press
Windows + R.
- Type regedit in the text field and press Enter.
- Enter the following path into the search field and double-click “ Flags”:
Computer\HKEY_CURRENT_USER\Control Panel\Accessibility\StickyKeys.
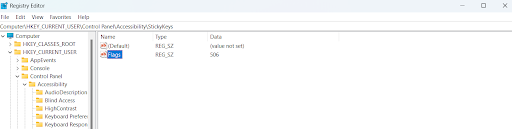
- Enter 58 and click OK to save the changes.
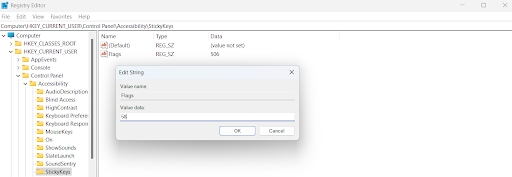
This will disable the feature.
Related:Ultimate Guide: Why and How to Defrag Windows Registry?
How to Activate Sticky Keys
Activating this accessibility feature is simple. Just reverse all the methods discussed above. You can enable Sticky Keys by pressing the Shift key five times.
If you’ve already disabled Keyboard shortcut for Sticky Keys, go to the Settings menu. Then, select Accessibility and click on Keyboard under Interaction.
Next, switch on the feature.
If you want to activate the feature by pressing the Shift key five times the next time you use it, click on Sticky Keys and enable Keyboard shortcut for Sticky Keys.

Conclusion
Sticky Keys can be useful. But if you don’t need it, you can easily disable it. You can press the Shift key five times to disable it.
You can also use Control Panel or the Settings app to disable this accessibility feature. Furthermore, you can customize the feature to suit your preference.
However, be careful when using the registry approach because it can cause issues with your PC. So, it’s advisable to use other methods to disable the Sticky Keys feature.
What’s your experience with Sticky Keys? Is there a method we didn’t mention? Share your thoughts in the comments below!