
There’s an ongoing conversation about whether to disable Windows Search indexing or keep it running. Microsoft introduced Microsoft Windows Search Indexer in Windows 2000 and hasn’t thought about dropping it. While you had to enable it in Windows 2000, it now comes enabled by default.
So, if you’re one of those who are against the service, you’ll have to disable it. Thankfully, this article shows you how to do that.
However, if you’re wondering whether you should disable indexing or not, you’re also in the right place. We’ll explain the concept of Windows Search indexing and tell you when it’s ideal to keep or disable the feature.
What Is Microsoft Windows Search Indexer?
Microsoft Windows Search Indexer (or simply Windows Search indexing) is a background service that scans and catalogs files, emails, and other content on your computer to speed up search results. Basically, it saves you from looking through every file manually each time you search. Instead, Windows uses this index—like a digital table of contents—to deliver faster, more accurate results.
Here’s how it works:
⇢ When Windows builds an index, it registers information for email messages, files, documents, and other content on your PC. The info it catalogs for the index includes things like file data, metadata, and contents.
⇢ After indexing, when you search for something, your PC refers to the created index rather than going through the actual file locations—this way, you get faster results.
So, for example, if you’re looking for a file, Windows checks its indexed information and pulls it up instead of going through your hard drive.
⇢ As you add, delete, or modify files, the index is updated in real time, keeping it current. Windows attempts to track all the changes on your computer. So, whenever you create or delete a file, the indexing service notes the changes. The same goes for new downloads and app installation and uninstallation.
Should I Disable Windows Search Indexing on Windows 10/11?
The answer to this question depends on your system. If you’re using a low-end PC or notice high disk or CPU usage, disabling Microsoft Windows Search Indexer might improve performance. The constant indexing may use up processing power and slow down your computer.
Also, depending on the type, number, and size of files on your computer, indexing may take up a significant chunk of your hard drive. But if you often search for files, keeping Microsoft Windows Search Indexer enabled ensures faster results and may be the more convenient option.
For example, Outlook uses indexed data to search your emails. Microsoft Edge uses it to display browser history results when you type in the address bar. In addition, the Settings app depends on it to show up-to-date results.
More so, some apps you download through the Microsoft Store rely on indexed data to search for your files and other PC content. Disabling indexing will increase the time it takes for Windows and other apps to return search results. So, if you have a fast CPU and a standard hard drive, you can keep indexing on. Since hard drives are slow to read, Windows will take longer searching for files without indexed data.
And with a fast CPU, you won’t have to worry about continuous background indexing. However, if you don’t rely on search a lot and are using a slow CPU and an SSD, it will be a good idea to turn indexing off. Windows can quickly look up files on SSDs since these drives are fast.
Also read: SSD vs. HDD: What’s the Difference and What to Choose?
Let’s sum this up:
- Improved performance on low-end PCs: It frees up system resources like CPU, RAM and disk, especially noticeable on older or slower machines
- Reduced disk usage: It can help reduce constant disk activity, particularly useful for HDD users
- Less background activity: You will be minimizing background processes, leading to smoother performance for gaming or intensive tasks
- Fewer heat and noise issues: Lower disk activity can mean cooler temperatures and less fan noise
- Slower file searches: Searching for files, emails, or apps may become noticeably slower without indexing
- Real-time results may lag: Newly added or changed files won’t show up as quickly in search results
- Limited search features: Some advanced search features in File Explorer or Outlook may not work properly
- Not ideal for frequent searchers: If you rely heavily on Windows Search, the experience may become frustrating
For example, the accumulation of junk files could clog your hard drive, unnecessary background applications could weigh down your CPU and RAM, and leftover or faulty registry keys could cause glitches. Fortunately, you can use an optimizer such as Auslogics BoostSpeed to manage these issues.
This way, you don’t necessarily have to turn off indexing. The program deletes junk and bad registry keys and protects your hard drive against spyware.
So, how do you disable search indexing? Let’s get right to it.
How to Disable Windows Search Indexing in Windows 10/11
There are different ways to manage search indexing. If you rely on it, you can limit the amount of system resources such as your RAM and CPU. For example, you can disable search indexing for specific folders and drives or partitions.
We’ll show the different ways to disable and modify Microsoft Windows Search Indexer.
Method 1: Disable Windows Search
If you don’t need Windows Search, you can disable it. However, once disabled, you will no longer be able to use search functions across the OS. These areas include the Settings app, Microsoft Store, and the Start menu. It also means Windows will no longer run indexing operations in the background. So, follow these steps to turn off the service:
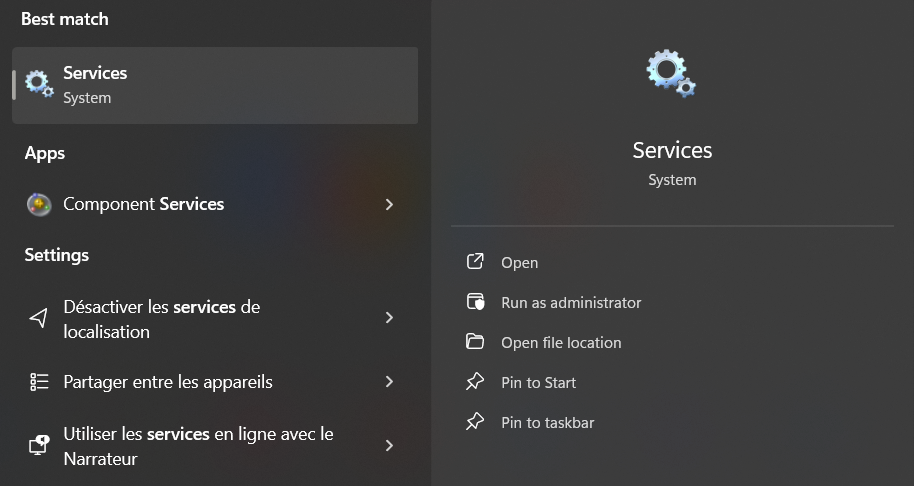
- Go to the Start menu and type services.
- Click on the Services application’s icon once the search panel brings it up.
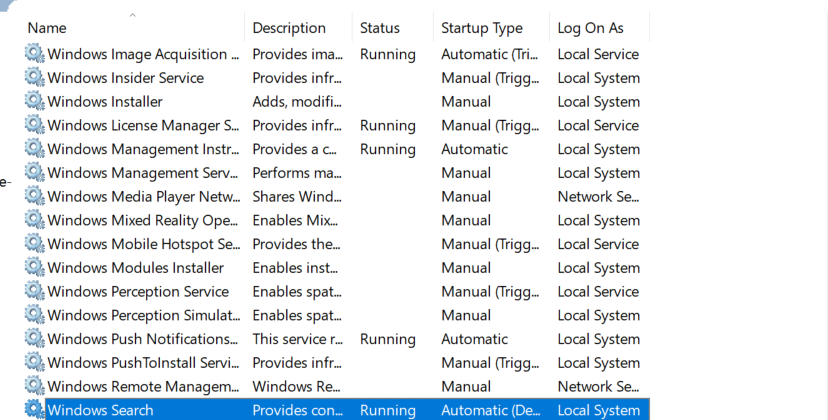
- After the Services application opens, scroll down to the Windows Search entry and double-click it.
- The Windows Search Properties window will now open.
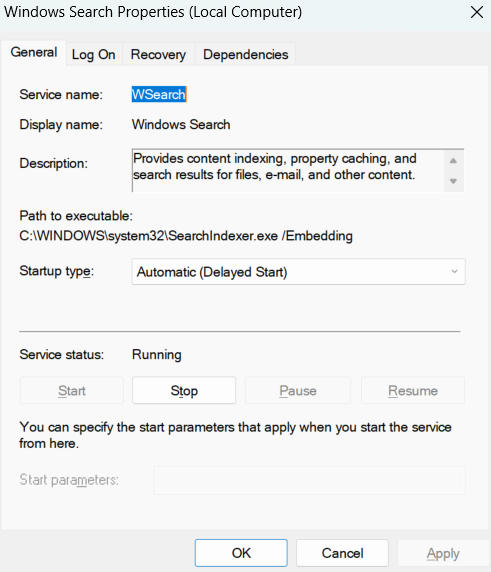
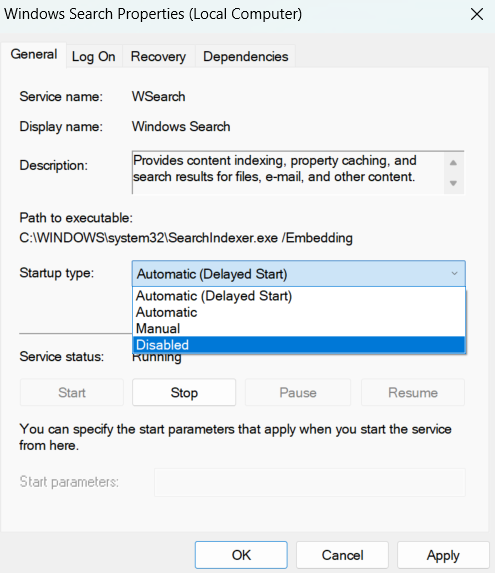
- Under the General tab, select Disabled in the Startup type drop-down.
- Click on the Stop button.
- Click OK.
- Restart your PC.
Method 2: Use the Command Prompt
You can enter a code in the Command Prompt to disable the Windows Search service and prevent it from launching on startup.
Follow these steps:
- Open the Run dialog window using the
Windows + Rcombo. - After the Run box opens, type CMD and tap
CTRL + Shift + Enteron your keyboard. - Click on Yes in the pop-up.
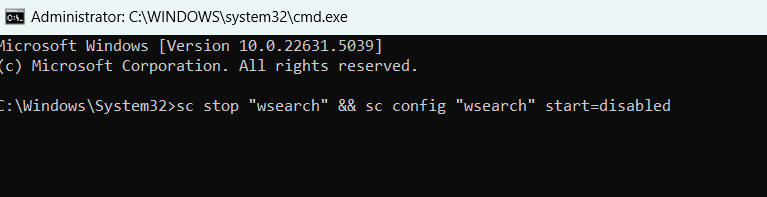
- Now, type the line below into the Administrator: Command Prompt window and hit the
Enterkey:
sc stop “wsearch” && sc config “wsearch” start=disabled
You can enable Windows Search again using this line:
sc config “wsearch” start=delayed-auto && sc start “wsearch”

That’s it.
Method 3: Disable indexing for specific areas
Windows provides the option to turn off indexing for specific folders. So, if there are areas where you don’t use search, you can disable indexing for them.
On the other hand, you can keep Microsoft Windows Search Indexer on for regularly used folders.
This option allows you to save RAM and CPU resources without completely getting rid of indexing.
Also, since the size of indexed data depends on the number and size of files Windows indexes, this option will reduce the storage strain.
So, follow these steps:
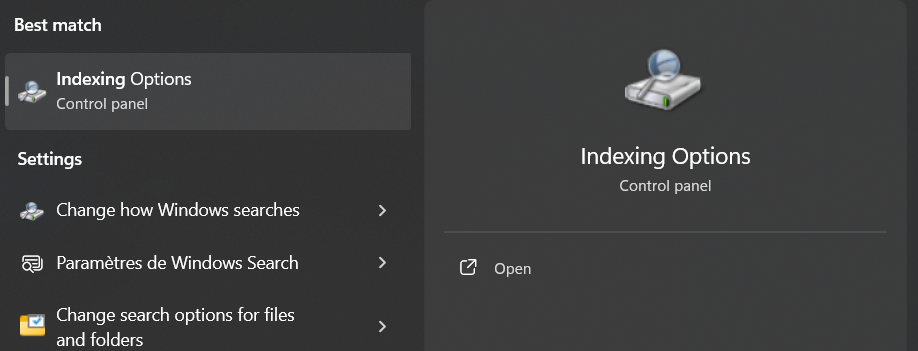
- Open the Start menu and type indexing.
- Click on Indexing Options.
Press
Windows + R to open Run, then type control panel in the Run dialog box, and hit Enter. After the Control Panel opens, go to the top-right corner and select Large icons in the View by drop-down. Click on Indexing Options. - Click on Modify in the Indexing Options dialog window.
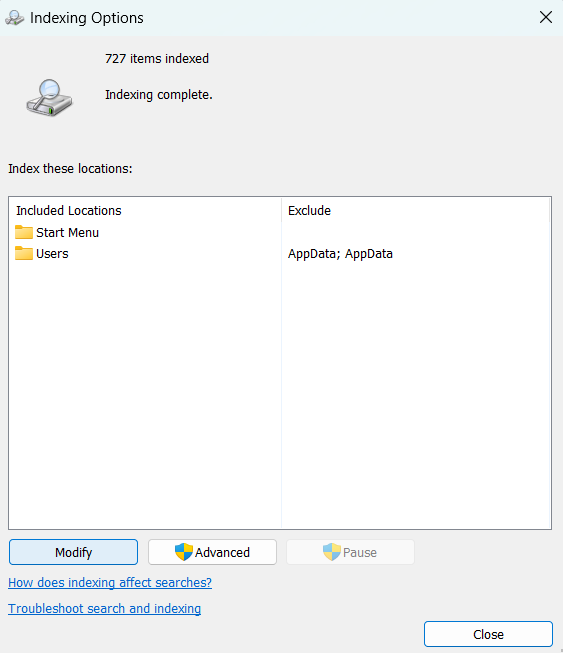
- Your indexing locations will now show up. Click on Show all locations if you can’t see your hard drive.
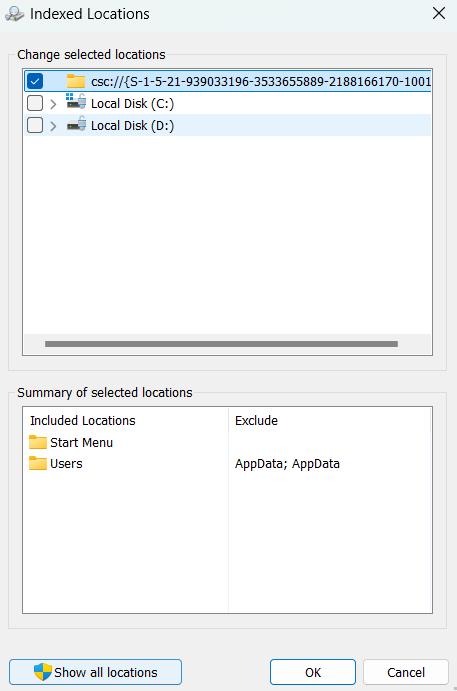
- Now, expand your hard drive by clicking on the arrow beside it.
- After expanding the drive, navigate to the folders you don’t want Windows to index and check the boxes beside them.
- After completing this exercise, click on the OK button.
- You’ll see the included and excluded locations under corresponding columns in the lower segment of the Indexed Locations dialog window.
Method 4: Disable Windows Search indexing by hard drive
You can turn off indexing on a particular hard drive or partition if you don’t search for files on it. This substantially reduces the resources indexing takes from your CPU and RAM.
Follow these steps:
- Use the
Windows + Ecombo to open File Explorer. - Once File Explorer shows up, head over to the left pane and click on This PC.
- Now, click on the hard drive you want indexing turned off for and right-click it.
- Click on Properties.
- Under the General tab, uncheck the box next to Allow files on this drive to have context indexed and click on the OK button.
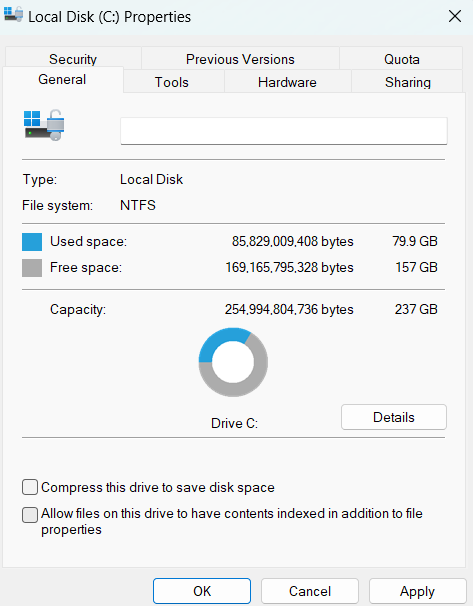
Windows will ask if you want the changes to apply to the root directory only or all the subfolders in the drive. Choose your option and select OK.
Method 5: Turn off indexing for Microsoft Outlook
As we mentioned, Microsoft Outlook uses indexed data to search for emails. If you don’t want that, you can turn off the feature for the program. And since Outlook doesn’t show up in the Indexed Locations dialog, you’ll have to make the changes in the app. Here’s how to disable Outlook’s indexing:
- Launch Outlook.
- Click on File and select Options.
- Once you get to the Options screen, go to the left pane and select Search.
- Now, go to the main page and click on Indexing Options.
- The Indexing Options dialog will now show up with Outlook included on the list.
- Next, click on Outloo k and click on the Modify button.
- After the Indexed Locations window appears, uncheck the box beside Outlook and click on the OK button.
Method 6: Rebuild your index
If you use search regularly but keep getting slow results, something is wrong with your search index. The problem could be due to a corrupt or malfunctioning index. In this case, you need to rebuild the index.
Follow this guide:
- Open the Start menu and type indexing.
- Click on Indexing Options in the search results.
- After the Control Panel opens, go to the top-right corner and select Large icons in the View by drop-down. Click on Indexing Options.
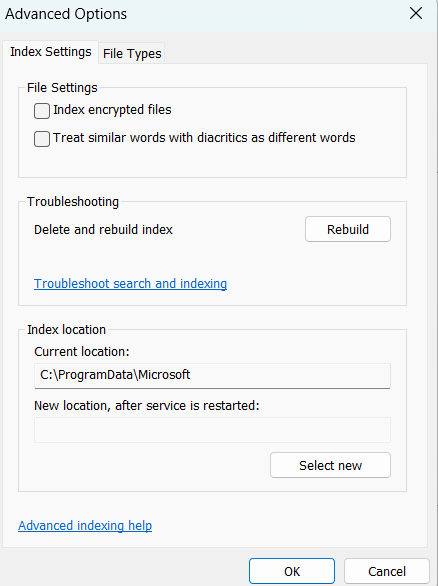
- Click on Advanced in the Indexing Options dialog window.
- Click on the Rebuild button and select OK.
How to Disable Indexing in Windows 10/11: Explained
So, there you have it. If you have made up your mind to turn off indexing on Windows, there are several ways in which you can do that. Let’s recap:
- You can disable Windows Search via Services or the Command Prompt.
- You can also disable indexing for specific folders via Indexing Options or disable indexing on a specific hard drive via File Explorer.
- Additionally, you can turn off indexing for Microsoft Outlook and other specific apps.
There is also a chance that there may be an issue with your search index—if it’s working particularly slow. In this case, you can rebuild the search index using the steps above. Remember that you can always reverse your changes if you’re not comfortable with the way your search works. In the end, what matters is up to you. If you don’t mind waiting a few seconds—or minutes—more for your search results to show up, you can do without Windows indexing.